
文章介绍了在Windows 10/11上快速设置Kali Linux VirtualBox的方法,通过下载预建镜像并完成简单安装步骤即可运行。文章详细说明了所需工具(如7-Zip和VirtualBox)、镜像提取与导入过程,并提供了性能优化建议和故障排除指南。该方法适合网络安全专业人士、学生及爱好者,在不修改主机系统的情况下进行渗透测试和学习。 2025-6-17 13:40:56 Author: www.blackmoreops.com(查看原文) 阅读量:14 收藏
Setting up Kali Linux VirtualBox on Windows 10 and 11 is the quickest way to run this powerful penetration testing distribution without dual-booting or permanently altering your system. The pre-built VirtualBox image allows you to have Kali Linux vBox running within minutes, making it perfect for cybersecurity professionals, students, and ethical hackers.
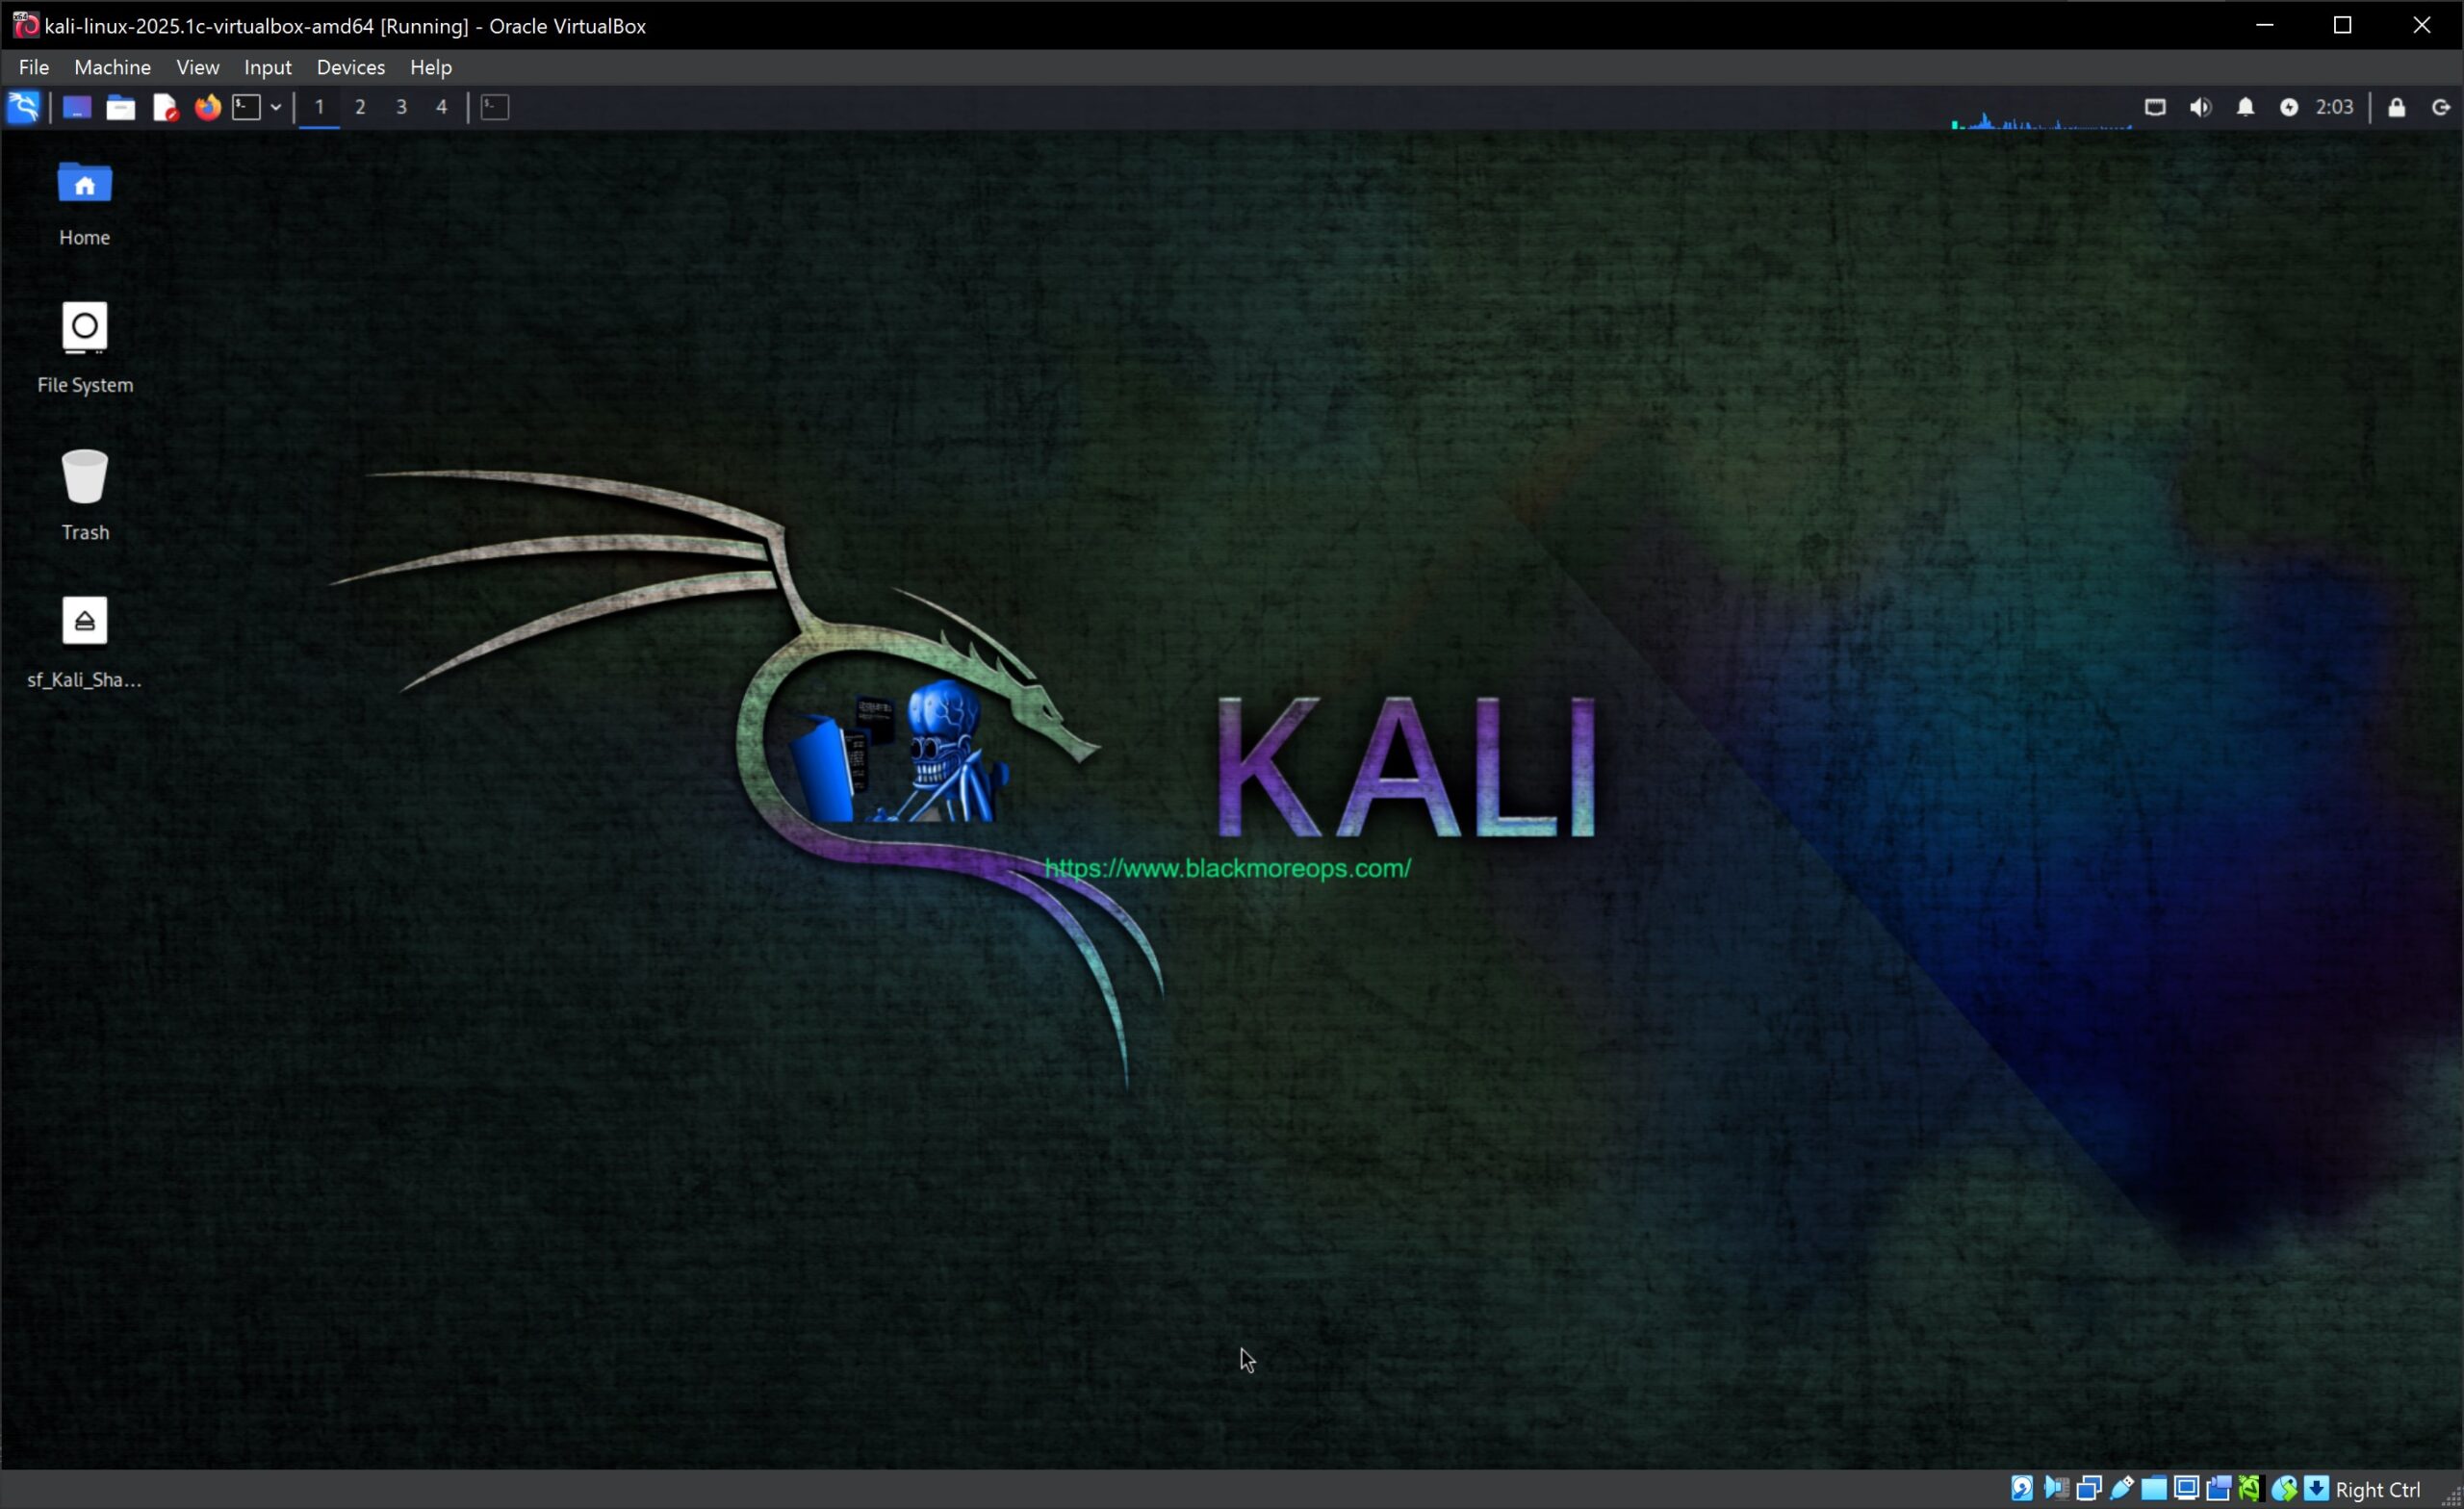
Kali Linux Virtualbox – vBox Image with Custom blackMOREOps Background
What You’ll Need
Before starting your Kali vBox installation, ensure you have:
- Windows 10 or Windows 11 (64-bit) with at least 4GB RAM (8GB recommended)
- 80GB free storage space (more recommended for additional tools and projects)
- Stable internet connection for downloads
- Administrator privileges on your Windows machine
Step 1: Download and Install 7-Zip
First, you’ll need 7-Zip to extract the compressed Kali vBox image:
Visit https://www.7-zip.org/
- Download the appropriate version for your Windows system (32-bit or 64-bit)
- Run the installer with administrator privileges
- Complete the installation using default settings
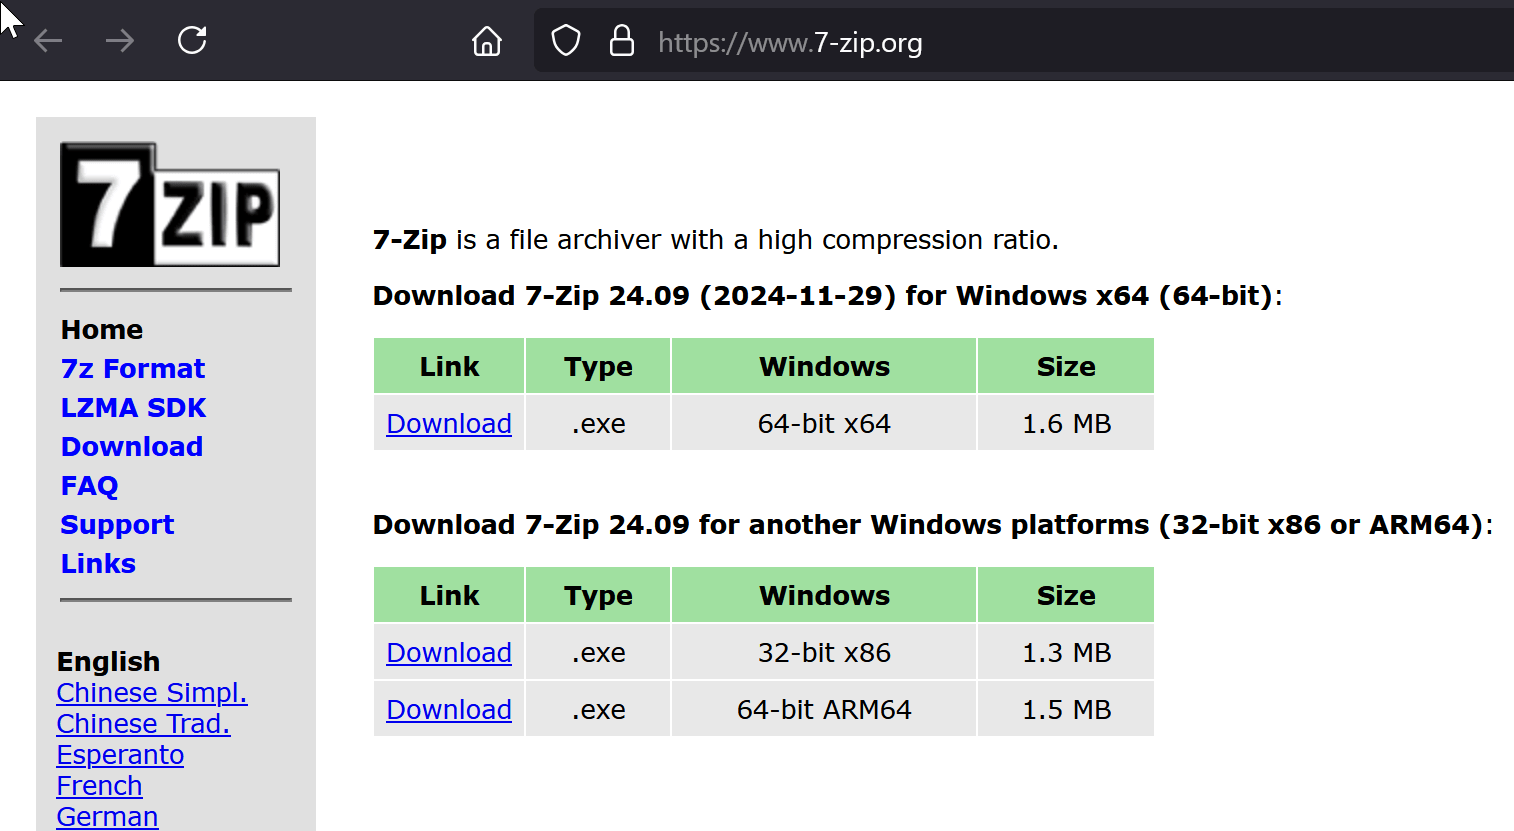
7-Zip download page showing Windows installer options
Step 2: Install Oracle VirtualBox
Oracle VirtualBox is essential for running your Kali Linux virtual machine:
- Navigate to https://www.virtualbox.org/
- Click “Downloads” and select “Windows hosts”
- Download the VirtualBox installer
- Run the installer as administrator
- Follow the installation wizard, accepting default settings
- Restart your computer when prompted
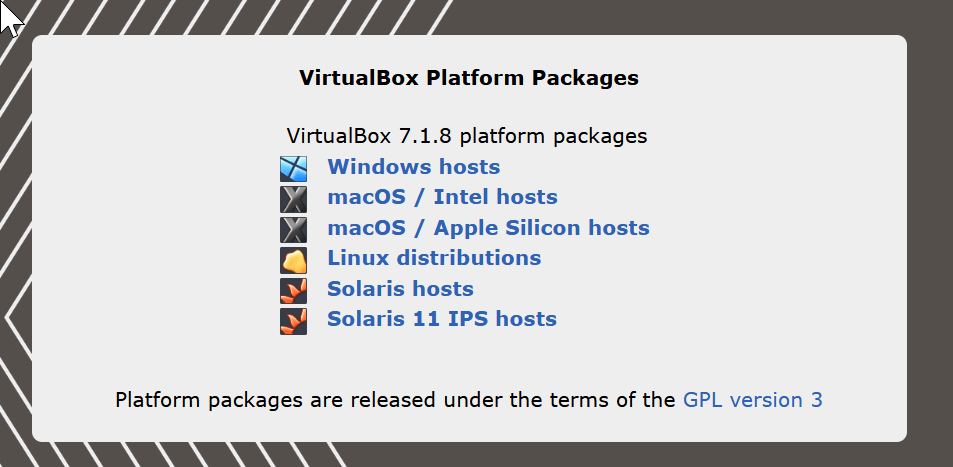
Oracle VirtualBox download page with Windows hosts option highlighted
Step 3: Download the Pre-built Kali Linux VirtualBox Image
The official Kali Linux VirtualBox image saves significant setup time:
- Go to https://www.kali.org/get-kali/#kali-virtual-machines
- Under “Pre-built Virtual Machines,” select the VirtualBox option
- Download the latest Kali Linux*.7z file (approximately 3.2G as shown below)
- Save it to an easily accessible location on your hard drive

Kali Linux official download page displaying pre-built VirtualBox images for Kali Linux VirtualBox setup
Step 4: Extract the VirtualBox Image
Using 7-Zip to extract the VirtualBox files:
- Right-click the downloaded .7z file
- Select “7-Zip” → “Extract Here”
- Wait for extraction to complete (this may take several minutes)
- You should now see a .vbox file and a .vdi file
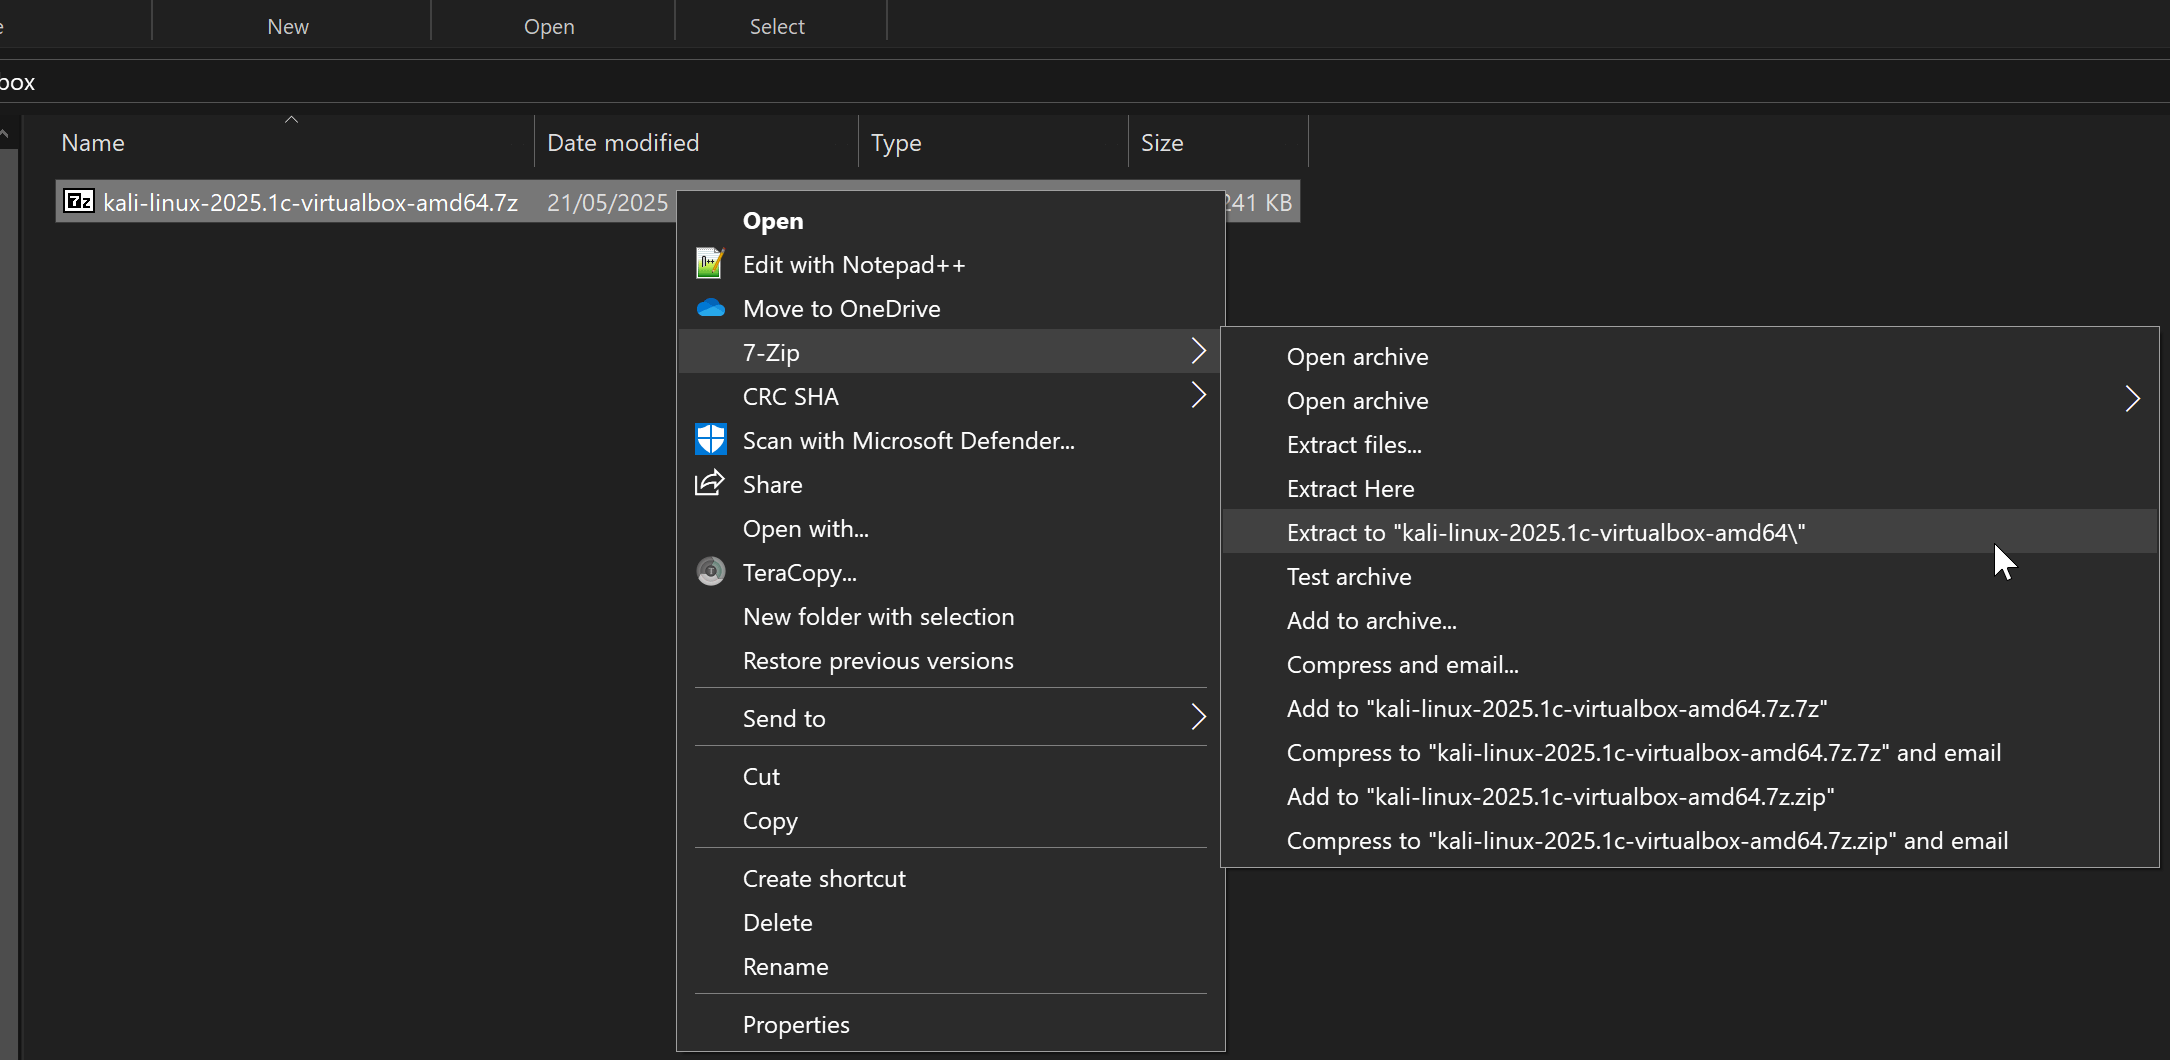
Windows File Explorer displaying 7-Zip extraction options for Kali Linux VirtualBox compressed file
Step 5: Import the Kali Linux VirtualBox Image
Now to import your Kali Linux virtual machine:
- Open Oracle VirtualBox Manager
- Click “File” → “Import Appliance” or press Ctrl+I
- Browse and select the extracted .vbox file
- Click “Next” to review import settings
- Adjust settings if needed (recommended: increase RAM to 4096MB if available)
- Click “Import” and wait for the process to complete

Oracle VirtualBox Manager interface displaying import appliance wizard for Kali Linux VirtualBox setup
Step 6: Configure Your Kali Linux VirtualBox Settings
Default import of Kali Linux will show the following settings screen. If you don’t want to change anything, simply Press Start Button and login with kali/kali username and password.
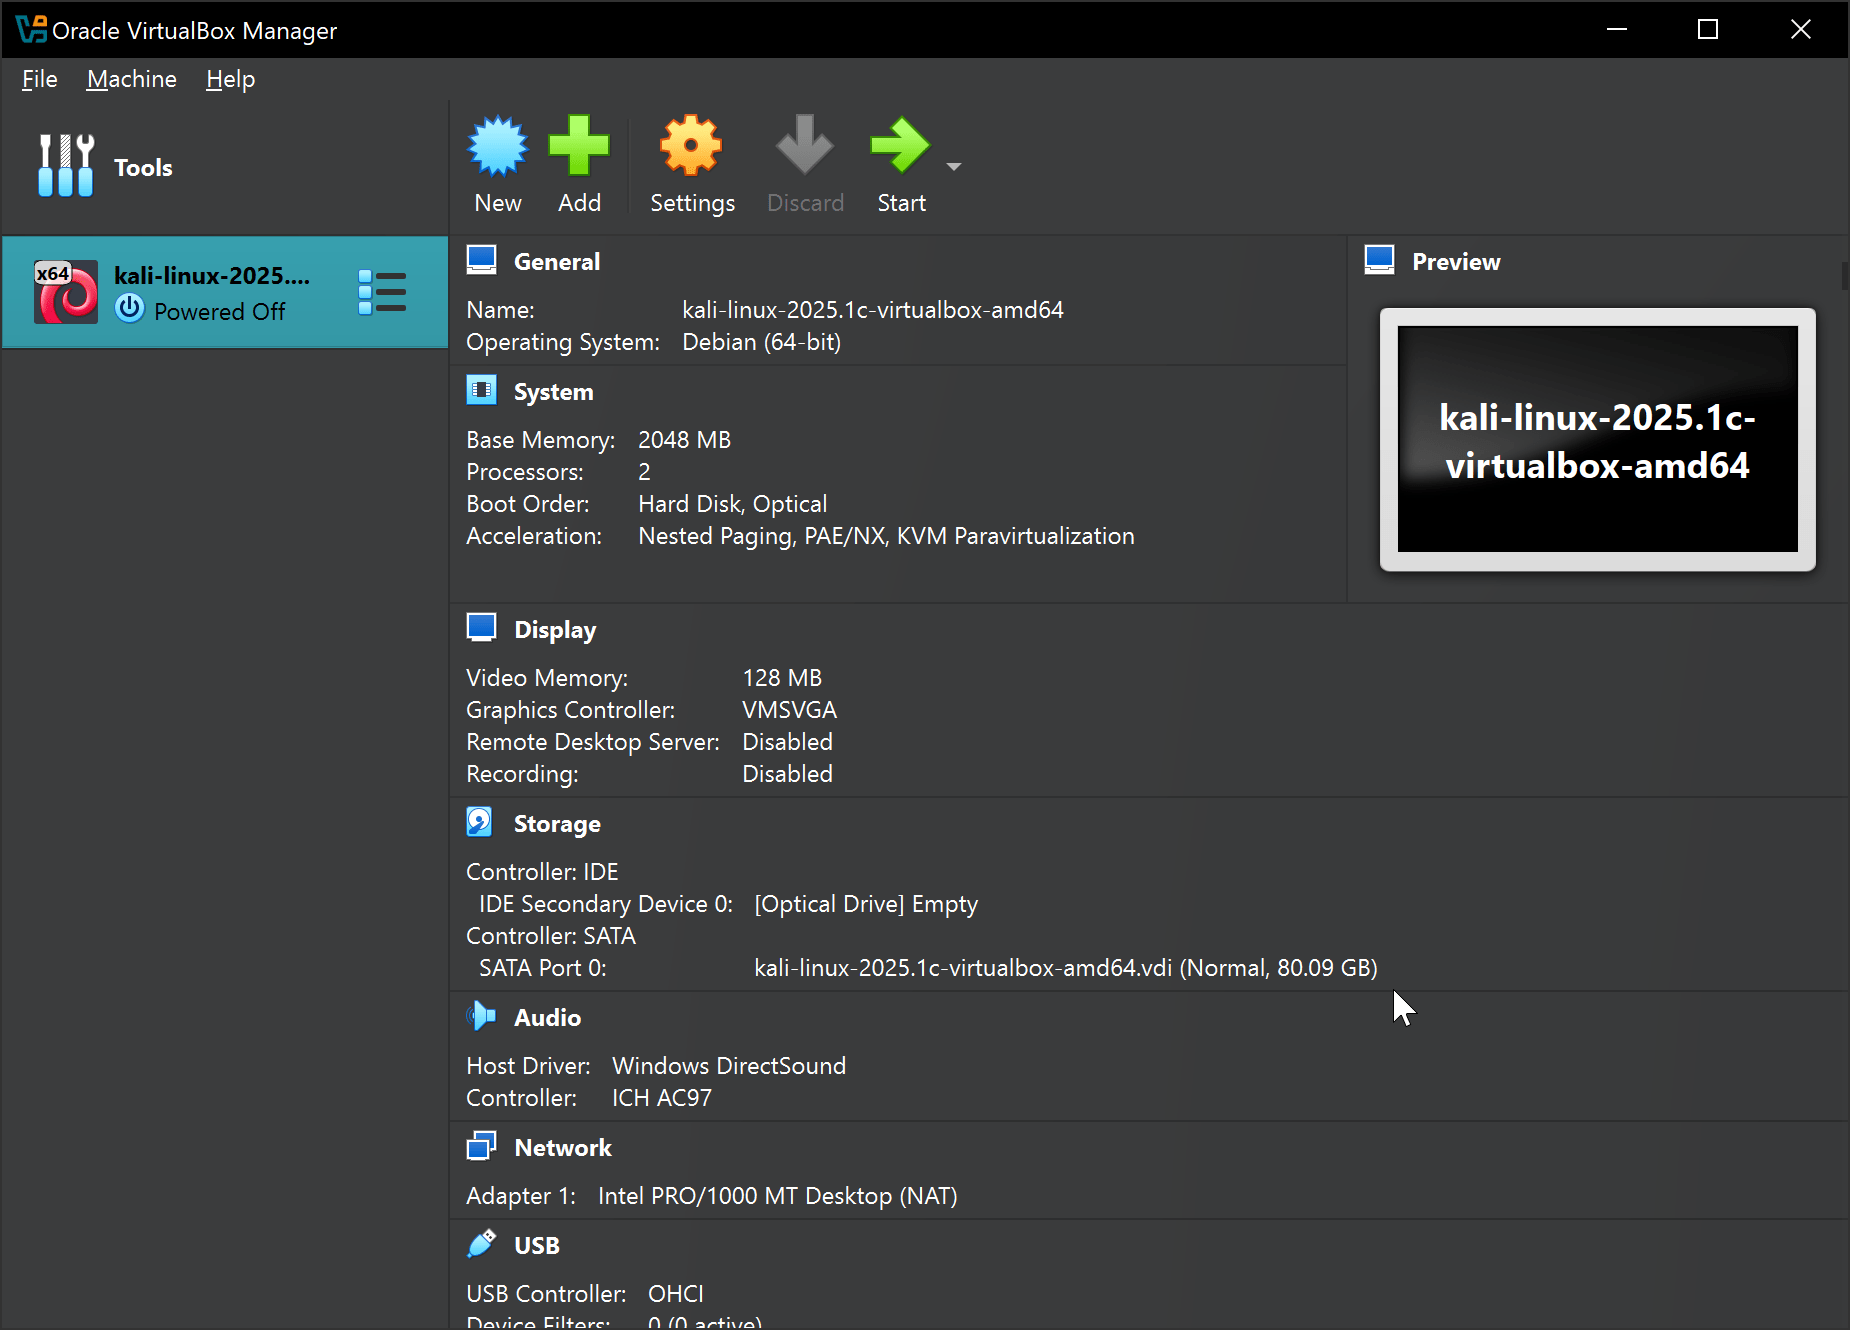
VirtualBox settings window showing Default Imported system configuration options for Kali Linux – blackMORE Ops – 9
If you need littkle more performance out of it, optimise these settings:
System Configuration
- Processors: Allocate 2-4 CPU cores for better performance
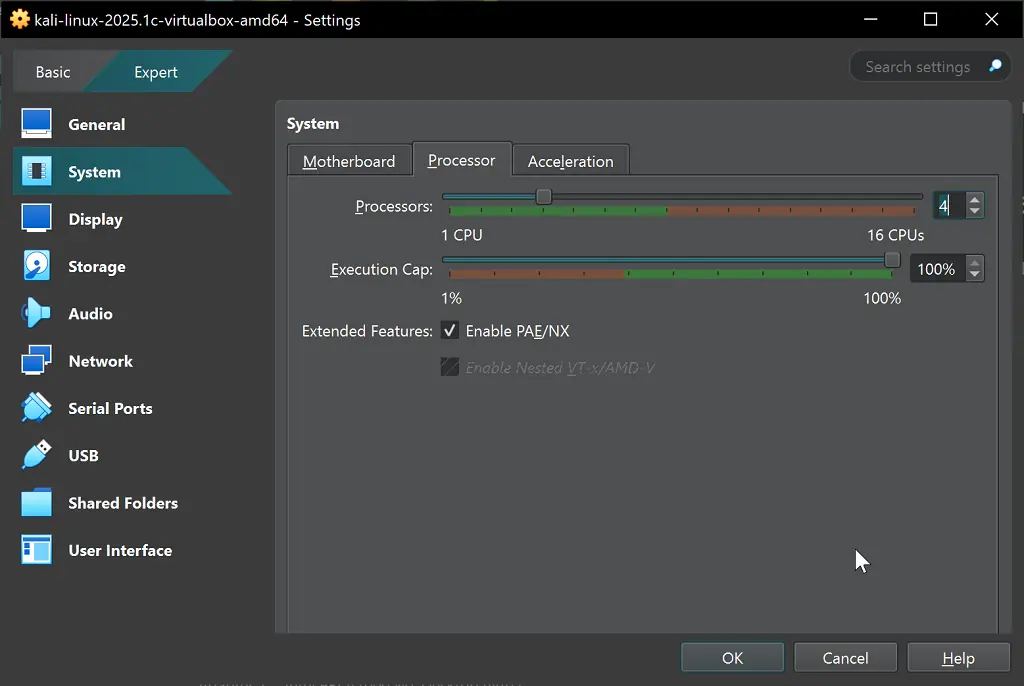
Adding more CPU Cores to the Virtualbox Pre-built Image
- Memory: Set to 4096MB (4GB) for optimal experience
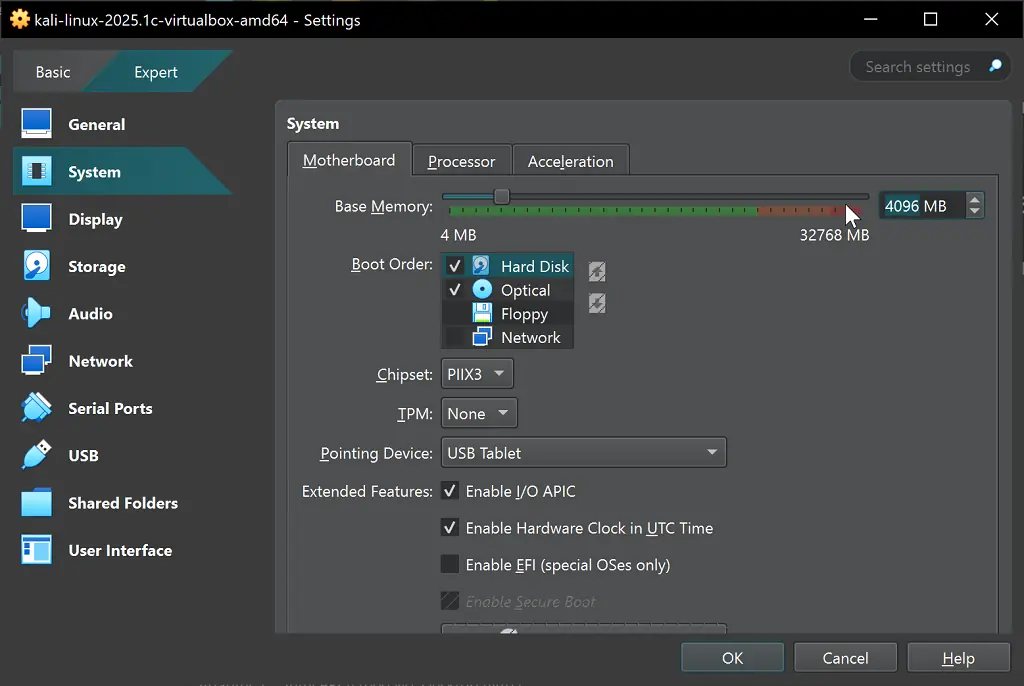
Adding More RAM to pre-built Kali Linux image
Display Settings
- 3D Acceleration: Enable for improved desktop experience
- Scale Factor: Adjust to 100% for proper screen scaling (if you have a massive monitor, you might want to change it, but for now we left it to default)
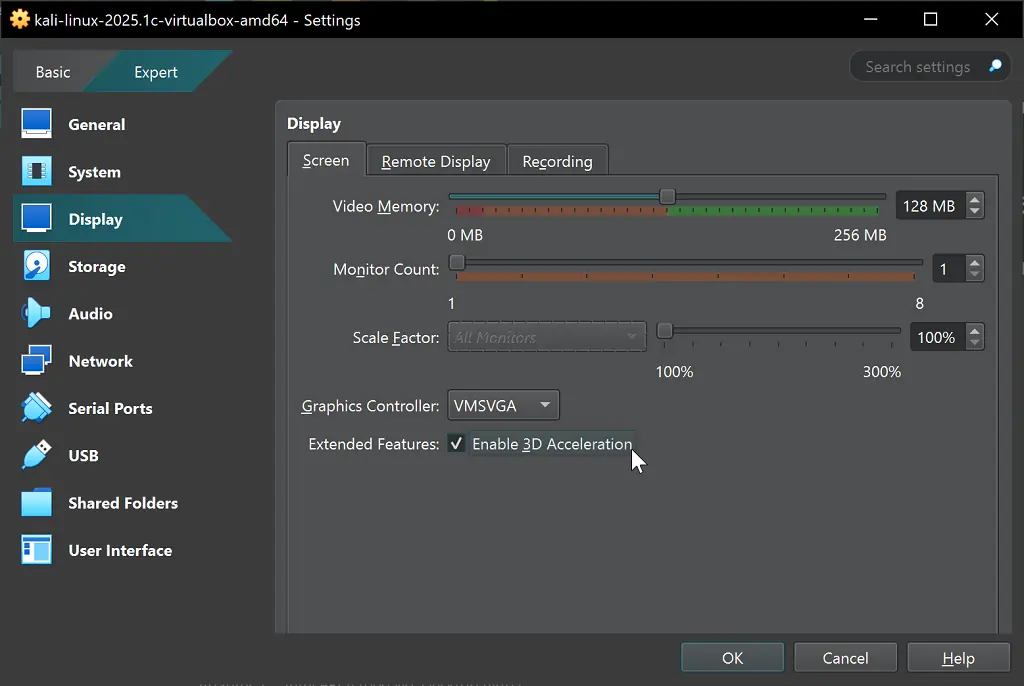
Enable 3D Accleration for Enable for improved desktop experience
Storage Configuration
- Consider enabling “Solid-state Drive” option for faster performance
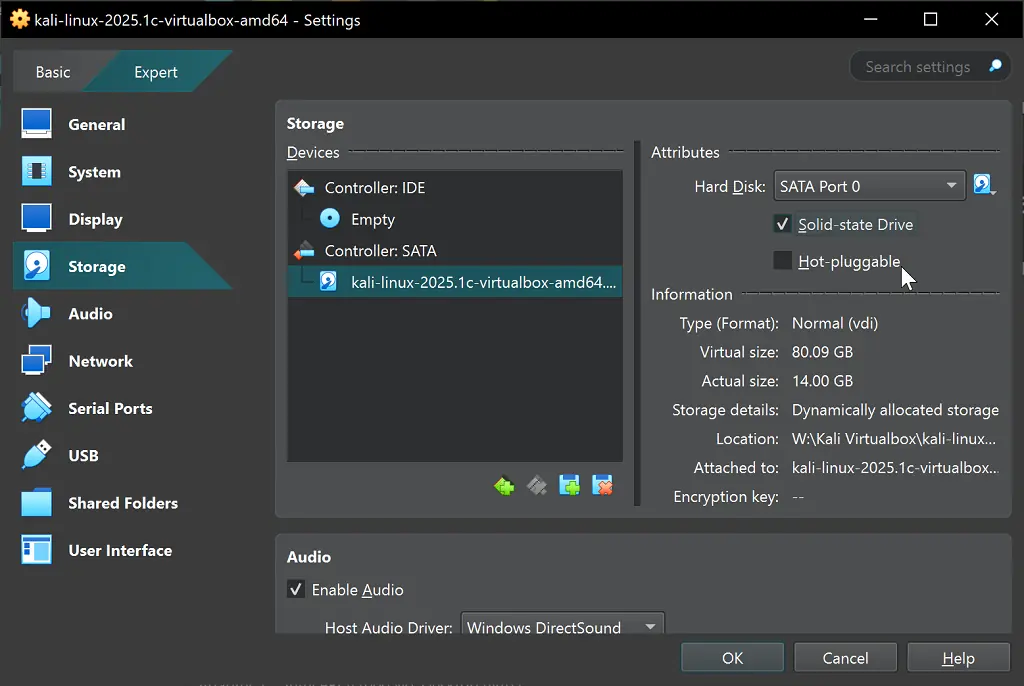
Change HDD to SSD Option
Network Setup
- Default NAT configuration works for most Kali Linux scenarios (you have your Host machine’s IP address)
- For advanced networking, consider bridged adapter mode (you get IP from Router or ISP)
USB Speed
- Change USB to 3.0 (xHCI) for higher speed BUS if you plan to plug in USB directly into your Kali Linux image.
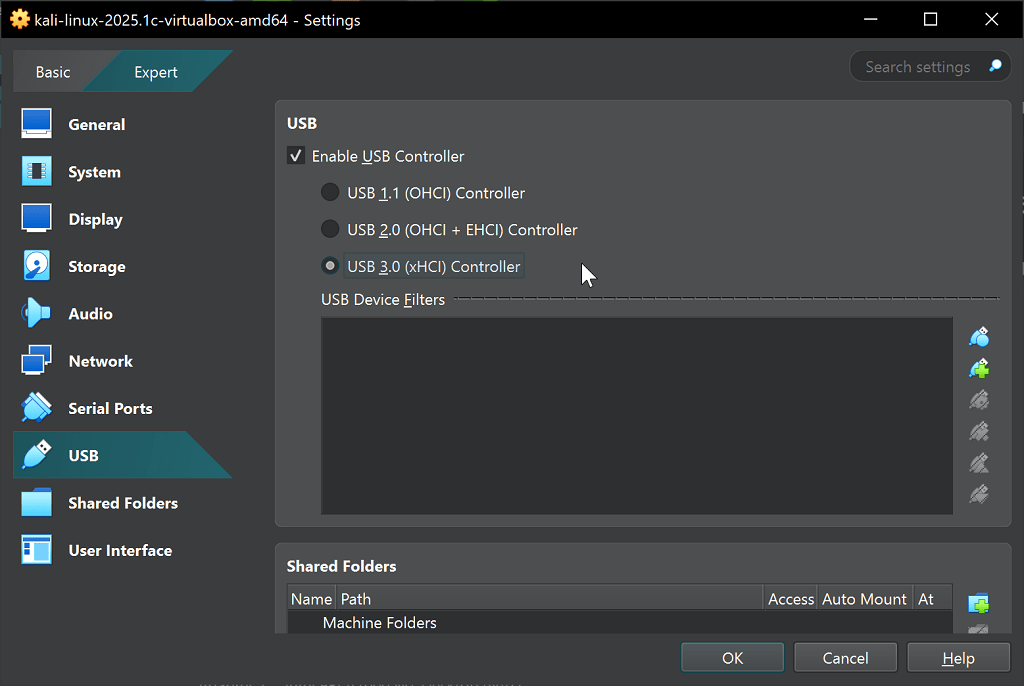
Changing USB option to USB3.0 for faster speed
Once you’ve updated everything, your Settings screen for the Virtualbox image will look something like this:

VirtualBox Manager interface with updated Pre-built Kali Linux Image. Select start button to start the machine
Step 7: Start Your Kali Linux VirtualBox Machine
Launch your Kali Linux virtual environment:
- Select your Kali Linux virtual machine in VirtualBox Manager
- Click the “Start” button or press Ctrl+S
- Allow the virtual machine to boot completely
- You’ll reach the Kali Linux login screen
Default Login Credentials
Your VirtualBox installation comes with default credentials:
- Username: kali
- Password: kali
Post-Installation Steps
Once your Kali Linux is running:
- Update the system: Run
sudo apt update && sudo apt upgrade -y - Install Guest Additions: Enhances integration between host and guest systems [Check this post]
- Configure shared folders: Enable file sharing between Windows and Kali Linux [Check this post]
- Create snapshots: Save clean states of your Kali installation
Troubleshooting Common Issues
Slow Performance
- Increase allocated RAM beyond 2048MB
- Allocate more CPU cores to the Kali VirtualBox image
Display Issues
- Install Guest Additions for proper screen resolution
- Enable 3D acceleration in display settings
- Adjust scale factor for high-DPI displays
- Add more than 128MB Video memory or consider setting high performance for Virtualbox
Network Connectivity Problems
- Verify NAT or bridged adapter configuration
- Reset network settings in VirtualBox
- Check Windows firewall settings
- Consider using a Network Card directly into Kali Linux vBox image.
Benefits of Using Kali Linux vBox
Running Kali Linux vBox offers several advantages:
- Isolation: Your host Windows system remains untouched
- Snapshots: Save multiple states of your penetration testing environment
- Easy removal: Delete the virtual machine without affecting Windows
- Resource control: Allocate specific amounts of RAM and storage
- Multiple instances: Run several Kali Linux vBox machines simultaneously
Security Considerations
When using Kali Linux vBox for security testing:
- Only use on networks you own or have explicit permission to test
- Keep your Kali Linux vBox installation updated
- Use snapshots before making significant changes
- Implement proper network isolation during testing
- Change default passwords
Conclusion
Setting up Kali VirtualBox on Windows 10 and 11 provides an excellent platform for learning cybersecurity, penetration testing, and digital forensics. The pre-built image approach means you can have a fully functional Kali Linux VirtualBox environment running in under 30 minutes. Whether you’re a cybersecurity professional, student, or enthusiast, this Kali vBox setup offers the flexibility and power you need for security testing in a safe, controlled environment. Remember to keep your Kali VirtualBox installation updated and always follow ethical guidelines when using penetration testing tools. Check Kali Linux posts to find something you might want to do.
如有侵权请联系:admin#unsafe.sh