Back in 2019, when I had a Pixel 2, I compared the Google Android camera app’s RAW (specifical 2023-6-26 03:0:0 Author: www.tbray.org(查看原文) 阅读量:14 收藏
Back in 2019, when I had a Pixel 2, I compared the Google Android camera app’s RAW (specifically DNG) files against its JPGs, and was left with little temptation to save the DNG files. I just repeated the experiment with my brand-new Pixel 7 and the results are more complicated.
Multiple reviewers have pointed out that the P7 has a really damn good camera/app combo and, well yeah, no point me pounding that drum. It’s scary good.
Background: “Real”-camera RAW · On my camera-that-isn’t-also-a-telephone (currently a Fujifilm X-T30) I always shoot in RAW, which is some weirdo Fuji proprietary bit-bag that Lightroom turns into DNG for me to edit.
The camera has a totally great JPG engine, which I mostly ignore. I think a lot of other photo-enthusiasts shoot RAW, and I think they do it for the same reason I do: Because of the “depth”. Which means that if part of your shot is blown-out-white or pitch-black, a RAW file likely has lots of useful picture there you can’t see, but a program like Lightroom can get it back for you. In a JPG, you just don’t expect that invisible data to be there.
How modern mobiles photograph · They have sensors and lenses that are pathetic compared to what’s on any recent DSLR or mirrorless camera. On the other hand, they have extremely powerful computers with specialized hardware for running machine-learning (ML) models.
What they do (and I think Google is regarded as extra-good at this) is called “computational photography”. This involves taking lots of pictures at a rate of 50/second or so and combining them to learn more about the scene and how to render it. Then there’s usually some HDR sugar tossed in. Then they apply ML models whose goal is to produce something that will please your eye.
Apparently the underlying sensor is 50MP, but the computation includes “binning” the pixels so you get 12.5MP. It’s easy to believe that this is definitely going to improve the quality and zoom-ability.
Then they wrap up the output in a JPG file that you can share to social media or print out and hang up.
What “RAW” means · In theory, it’s historically meant the photo-intensity readings from the individual pixels in the sensor, with no processing at all. The idea is that using a powerful photo-editor like Lightroom, you (because you’re a human and oh so clever), can do a better job of beautifying those bits than a pathetic little lump of silicon.
On the evidence, the computational-photography posse over at Google doesn’t agree.
Enough talk, show me the pictures!
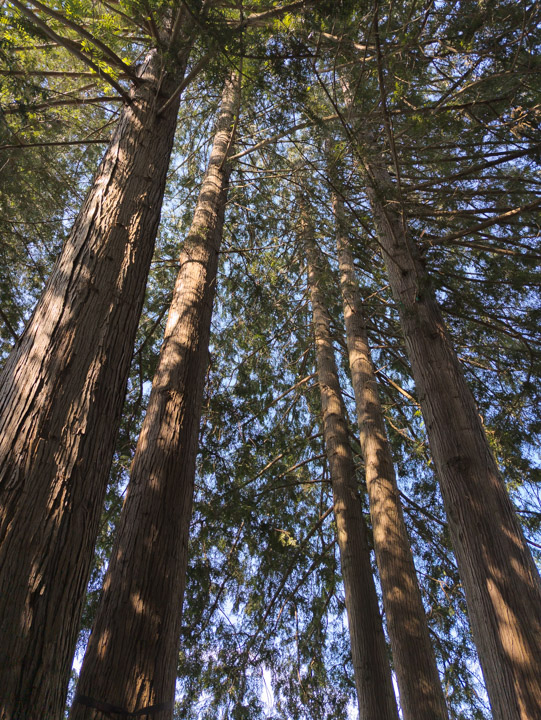
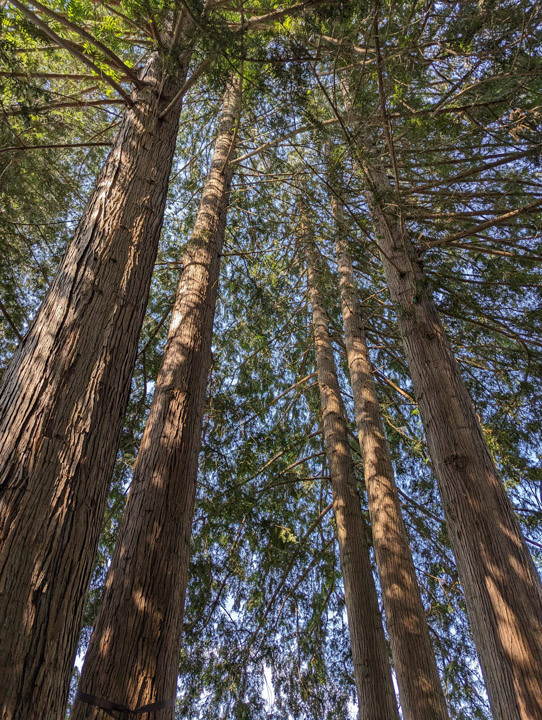
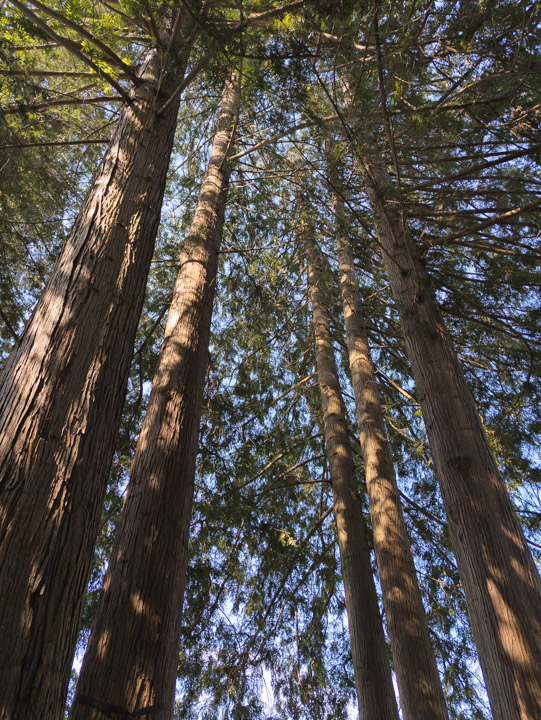
Case study: Trees · This photograph is taken lying in a hammock looking up at big evergreens. DNG above, JPG below.
· · ·
Gosh, that JPG looks a lot better, doesn’t it. I wonder if I can achieve the same effect with Lightroom?
The answer is yes:
Tint: +9 toward red.
Contrast: +23
Highlights: -50
Shadows: +68
Blacks: -49
Vibrance: +5
Sharpening: 84
(I’m not going to show you the corrected version, you’ll have to take my word for it; they’re about indistinguishable.)
A question arises: If all I had was the DNG, would I have made the right moves to get the more-pleasing version?
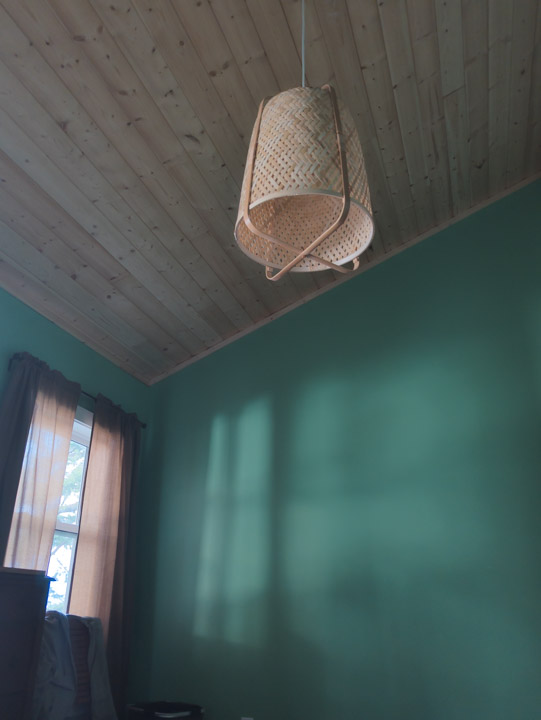
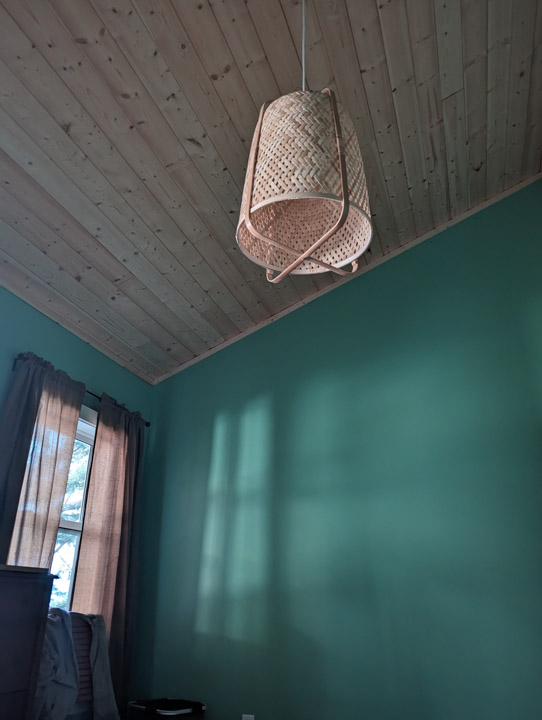
Case study: Dark room · This room was very dark; I seem to remember that the camera switched into some low-light mode, of which I think it has more than one. DNG up, JPG down.
· · ·
This DNG is really skanky. Once again, could I brush it up in Lightroom? In this case, the answer is “not even close.” In particular, whatever the camera did to capture the textures and verticals in those curtains is pretty magical. I dug way into those bits with Lightroom and just couldn’t find that stuff.
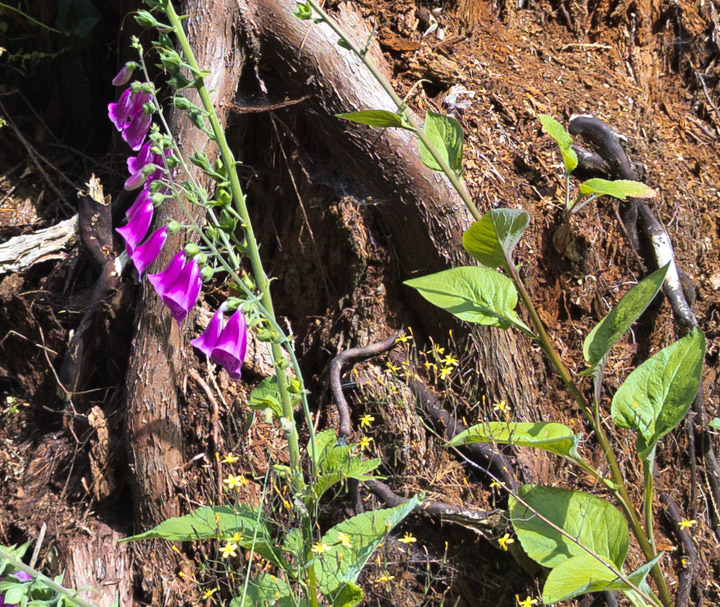
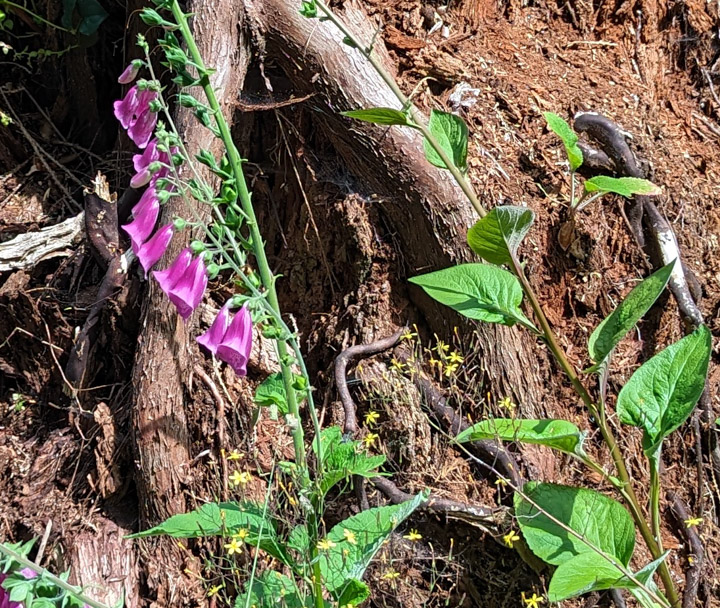
Case study: Colors · This is a tiny crop, near-100%, into a picture of a big old stump covered with flowers and little green plants. DNG up, JPG down.
· · ·
Pretty clearly, the phone has strong ideas about what colors things should be. It’s desaturated the brown parts of the picture, and turned the leaves from a bit bleached and yellow-ish to vibrant picture-of-good-health green.
Could I achieve the same effect with Lightroom? Yes, but I wouldn’t want to. I went and checked and the DNG is the color those leaves really are. Does the picture look prettier with the green vs brown treatment? I guess, but this particular opinion statement bothers me.
Hmm, something odd is going on. Looked at in Lightroom, the leaf color in those two treatments is strikingly different. But the exported version is closer, the leaves are less yellow. I wonder if Lightroom’s JPG generator also has opinions about plant health? Everything is more complicated than you think.
Things I learned ·
You have to dig pretty deep into the Camera app preferences to find the enable-RAW switch. What’s good is that once you have, it doesn’t switch to all RAW all the time. Instead, you get a toggle in the quick-prefs pulldown to enable or disable RAW+JPG per-picture.
The JPGs in every case made the sky less blue than the DNG. I didn’t notice this till later so I don’t know which variation is truer, but the sky is prettier in the DNGs.
It may seem to the observant reader that my feelings about truth and beauty are not entirely self-consistent.
The DNG and JPG files have different pixel dimensions, which seems weird to me. The JPG is about 1% bigger. And if you look at the pictures, the edges of the JPG stretch out a tiny bit further. Huh?
The JPG process always applies a judicious amount of sharpening. I can’t fault its judgment.
It also does what looks like lens correction. I don’t know the correct technical term, but it looks like the center of the picture is pulled back a little bit to occupy less space. Back in DSLR days, Lightroom used have a huge table of All The Lenses and would do this for you. These days, mirrorless cameras take care of it in-place.
I looked into Lightroom and it offers corrections for various Pixels, one labeled “Pixel rear camera”, which did the same-and-a-little-more on the JPG and was a no-op on the DNG. Huh?
Note to self: Take a picture of a rectangular grid and find out which is correct.
Everyone knows that RAW is better because of image depth, you can pull data out of areas that look black or bleached. Um, no longer; the JPG seems to have about as much depth as the DNG. Which is a lot less than my Fujifilm camera, but more than I’m used to getting from JPGs.
On my Fujifilm I always shoot RAW+JPG because you can pull the JPGs over to your phone using the fragile sometimes-it-works Android app, for sharing. When I pull those RAW+JPG pairs off the SD card into Lightroom, it understands that they’re the same picture. I get my Pixel photos into Lightroom by opening them in the Lightroom app on the phone, which works OK but doesn’t realize that the DNG and JPG are the same picture. (Which made this piece easier to write.)
What I think about all this · Uh, I dunno. I do wish Google would publish an explanation of what that “RAW” file actually is. Because, having done this work, I have no idea.
I enjoy touching pictures up with Lightroom. And I still can, even if they’re JPGs.
I think I’d turn on the RAW capture for anything where I care a lot about color accuracy. As of now, I can’t think of another situation where it’s the best choice.
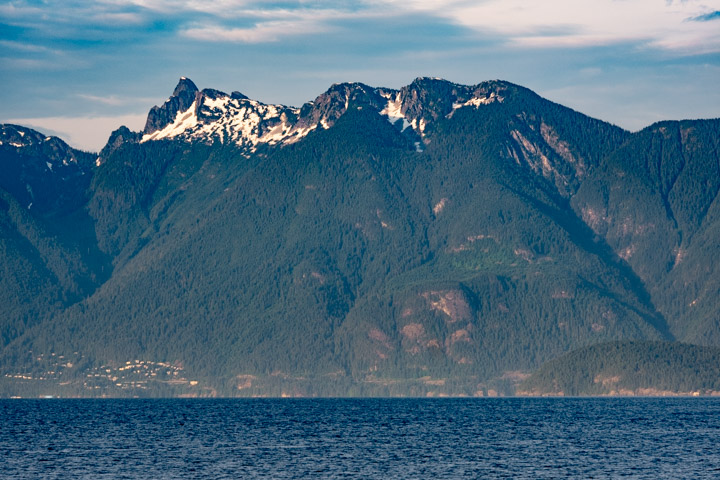
Anyhow, here’s a picture taken with a nice Fujifilm camera using a 145mm F/2.0 prime lens. The mountains are 16.5km (10.25 miles) away. It looks brilliant on my big 4K screen. Can mobiles do that yet?
如有侵权请联系:admin#unsafe.sh
