白帽子
STATEMENT
声明
由于传播、利用此文所提供的信息而造成的任何直接或者间接的后果及损失,均由使用者本人负责,雷神众测及文章作者不为此承担任何责任。
雷神众测拥有对此文章的修改和解释权。如欲转载或传播此文章,必须保证此文章的完整性,包括版权声明等全部内容。未经雷神众测允许,不得任意修改或者增减此文章内容,不得以任何方式将其用于商业目的。
基础环境搭建
用到的cobaltstrike原版本是4.4,可以去找下原包,4.4的sha256为:
7af9c759ac78da920395debb443b9007fdf51fa66a48f0fbdaafb30b00a8a858https://verify.cobaltstrike.com/
为什么是4.4而不是4.5或者更新的版本?
更新的可能有些暗桩并没有发现,4.5前一段还有一个暗桩被公开。当然如果4.7流出来的话,可以优先二开4.7,因为原生支持socks5代理。
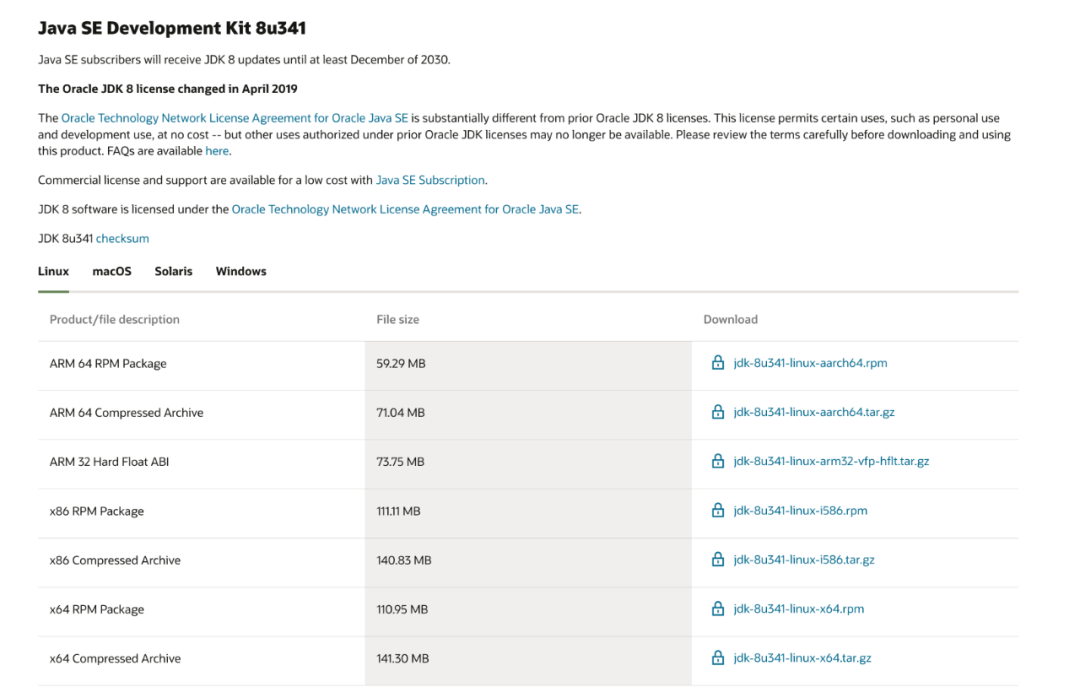
java环境,有jdk就行,个人推荐还是oracle jdk8
oracle官方下载地址:https://www.oracle.com/java/technologies/downloads/# java8
反编译与调试编译
反编译
公开的源码包:https://www.ddosi.org/cs-4-4/
用之前最后看一下,当然也可以自己反编译
反编译的话推荐用Luyten:https://github.com/deathmarine/Luyten
结合已经公开的源码包看
调试编译
模块,将原版jar包导入作为依赖
工件,可以理解成编译输出jar包
Client端
-XX:+AggressiveHeap -XX:+UseParallelGCTeamServer端
-XX:ParallelGCThreads=4 -server -XX:+AggressiveHeap -XX:+UseParallelGC -Dfile.encoding=UTF-8先弹个helloword编译个试试,界面在aggressor/Aggressor.java,导入类即可之后构建工件。
JOptionPane.showMessageDialog(null, "Hello world");成功弹出"Hello world",之后就可以删掉这个弹窗的代码,开始二开CS之旅了。
整个授权
直接添加硬编码密钥的方法,修改common/Authorization.java里面的Authorization函数,把没有的直接注释掉,当然,删了也可以。
public Authorization() {this.watermark = 0;this.validto = "";this.error = null;this.valid = false;/*String s = CommonUtils.canonicalize("cobaltstrike.auth");if (!new File(s).exists()) {try {File parentFile = new File(this.getClass().getProtectionDomain().getCodeSource().getLocation().toURI());if (parentFile.getName().toLowerCase().endsWith(".jar")) {parentFile = parentFile.getParentFile();}s = new File(parentFile, "cobaltstrike.auth").getAbsolutePath();}catch (Exception ex) {MudgeSanity.logException("trouble locating auth file", ex, false);}}final byte[] file = CommonUtils.readFile(s);if (file.length == 0) {this.error = "Could not read " + s;return;}final AuthCrypto authCrypto = new AuthCrypto();final byte[] decrypt = authCrypto.decrypt(file);*/final AuthCrypto authCrypto = new AuthCrypto();final byte[] decrypt = {1, -55, -61, 127, //证书时间限制29999999(永久)0, 0, 0, 1, //watermark(水印)44, //版本16, 20, 20, 20, 20, 20, 20, 20, 20, 20, 20, 20, 20, 20, 20, 20, 20,16, 20, 20, 20, 20, 20, 20, 20, 20, 20, 20, 20, 20, 20, 20, 20, 20,16, 20, 20, 20, 20, 20, 20, 20, 20, 20, 20, 20, 20, 20, 20, 20, 20,16, 58, 68, 37, 73, 15, 56, -102, -18, -61, 18, -67, -41, 88, -83, 43, -103,16, 94, -104, 25, 74, 1, -58, -76, -113, -91, -126, -90, -87, -4, -69, -110, -42};if (decrypt.length == 0) {this.error = authCrypto.error();return;}
暗桩1
common/Stater.java的initializeStarter函数,直接注释掉,结束下一个。
暗桩2
common/Stater2.java的initializeStarter函数,直接注释掉,结束下一个
暗桩3
common/Helper.java的startHelper函数,将中间大量计算的注释掉,返回值为真即可
暗桩4
beacon/BeaconData.java里的shouldPad函数,this.shouldPad值改成false就ok
暗桩5
beacon/CommandBuilder.java,红线之下,全部删掉,这个暗桩属实是有点坑了(4个小时左右会再校验,校验不通过,功能失效)
修改默认生成配置文件名字
aggressor/Prefs.java里面设置了客户端保存在用户目录下的配置文件名称:.aggressor.prop,修改即可(防止踩蜜罐后导致服务端链接信息暴露)
修改checksum8算法
直接删掉checksum8算法计算,固定请求的url路径,common/CommonUtils.java请求的url
public static String MSFURI(int var0) {return "weui.min.js";}public static String MSFURI_X64() {return "weui.js";}
cloudstrike/WebServer.java,函数对应MSFURI、MSFURI_X64
public static long checksum8(String text) {if (text.length() < 4) {return 0L;} else {text = text.replace("/", "");long sum = 0L;for(int x = 0; x < text.length(); ++x) {sum += (long)text.charAt(x);}//return sum % 256L;return sum;}}public static boolean isStager(String uri) {return checksum8(uri) == 1079L; //weui.min.js的长度}public static boolean isStagerX64(String uri) {return checksum8(uri) == 709L;//weui.js的长度}
checksum8辅助算法计算脚本,可以在https://c.runoob.com/compile/10/ ,直接运行计算
public class EchoTest {public static long checksum8(String text) {if (text.length() < 4) {return 0L;}text = text.replace("/", "");long sum = 0L;for (int x = 0; x < text.length(); x++) {sum += text.charAt(x);}return sum;}public static void main(String[] args) throws Exception {System.out.println(checksum8("ds6f565sdf44s65d4f21dsf1.jpg"));}}
修复CVE-2022-23317漏洞
cloudstrike/WebServer.java的_serve函数添加上个url的判断
if (!uri.startsWith("/")) {return this.processResponse(uri, method, header, param, false, null, new Response("400 Bad Request", "text/plain", ""));}
修改xor密钥
beacon/BeaconPayload.java的beacon_obfuscate函数,将46修改成想要的数字,现在的46对应的是2e,比如66对应42进制,可以使用转换进制https://tool.oschina.net/hexconvert/
对应的需要修改dll里的xor密钥,先解密->修改->加密->替换。
需要修改的dll文件有
解密可以使用这个项目https://github.com/ca3tie1/CrackSleeve ,下面贴一下适用于4.4的解密代码
import common.*;import dns.SleeveSecurity;import java.io.*;import java.util.Enumeration;import java.util.jar.JarEntry;import java.util.jar.JarFile;public class CrackSleeve {private static byte[] OriginKey40 = {27, -27, -66, 82, -58, 37, 92, 51, 85, -114, -118, 28, -74, 103, -53, 6 };private static byte[] OriginKey41 = {-128, -29, 42, 116, 32, 96, -72, -124, 65, -101, -96, -63, 113, -55, -86, 118 };private static byte[] OriginKey42 = {-78, 13, 72, 122, -35, -44, 113, 52, 24, -14, -43, -93, -82, 2, -89, -96};private static byte[] OriginKey43 = {58, 68, 37, 73, 15, 56, -102, -18, -61, 18, -67, -41, 88, -83, 43, -103};private static byte[] OriginKey44 = {94, -104, 25, 74, 1, -58, -76, -113, -91, -126, -90, -87, -4, -69, -110, -42};private static byte[] CustomizeKey = null;private String DecDir = "sleeve";private String EncDir = "Encode/sleeve";public static void main(String[] args) throws IOException {if (args.length == 0 || args[0].equals("-h") || args[0].equals("--help")) {System.out.println("UseAge: CrackSleeve OPTION [key]");System.out.println("Options:");System.out.println("\tdecode\t\tDecode sleeve files");System.out.println("\tencode\t\tEncode sleeve files");System.out.println("\tkey\t\tCustomize key string for encode sleeve files");System.exit(0);}String option = args[0];// if (option.toLowerCase().equals("encode"))// {// if (args.length <= 1){// System.out.println("[-] Please enter key.");// System.exit(0);// }// String CustomizeKeyStr = args[1];// if (CustomizeKeyStr.length() < 16)// {// System.out.println("[-] key length must be 16.");// System.exit(0);// }// System.out.println("Init Key: "+CustomizeKeyStr.substring(0,16));// CustomizeKey = CustomizeKeyStr.substring(0,16).getBytes();// }CrackSleeve Cracker = new CrackSleeve();// 使用正版key初始化SleeveSecurity中的keyif (option.equals("decode")){CrackSleevedResource.Setup(OriginKey44);Cracker.DecodeFile();}else if (option.equals("encode")){//CrackSleevedResource.Setup(CustomizeKey);CrackSleevedResource.Setup(OriginKey44);Cracker.EncodeFile();}}private void DecodeFile() throws IOException {// 文件保存目录File saveDir = new File(this.DecDir);if (!saveDir.isDirectory())saveDir.mkdirs();// 获取jar文件中sleeve文件夹下的文件列表try {String path = this.getClass().getClassLoader().getResource("sleeve").getPath();String jarPath = path.substring(5,path.indexOf("!/"));Enumeration<JarEntry> jarEnum = new JarFile(new File(jarPath)).entries();while (jarEnum.hasMoreElements()){JarEntry Element = jarEnum.nextElement();String FileName = Element.getName();if (FileName.indexOf("sleeve")>=0 && !FileName.equals("sleeve/")) {System.out.print("[+] Decoding "+FileName+"......");byte[] decBytes = CrackSleevedResource.DecodeResource(FileName);if (decBytes.length > 0) {System.out.println("Done.");CommonUtils.writeToFile(new File(saveDir,"../"+FileName),decBytes);}elseSystem.out.println("Fail.");}}} catch (IOException e) {e.printStackTrace();}}private void EncodeFile(){// 文件保存目录File saveDir = new File(this.EncDir);if (!saveDir.isDirectory())saveDir.mkdirs();// 获取解密文件列表File decDir = new File(this.DecDir);File[] decFiles = decDir.listFiles();if (decFiles.length == 0) {System.out.println("[-] There's no file to encode, please decode first.");System.exit(0);}for (File file : decFiles){String filename = decDir.getPath()+"/"+file.getName();System.out.print("[+] Encoding " + file.getName() + "......");byte[] encBytes = CrackSleevedResource.EncodeResource(filename);if (encBytes.length > 0) {System.out.println("Done.");CommonUtils.writeToFile(new File(saveDir,file.getName()),encBytes);}elseSystem.out.println("Fail.");}}}class CrackSleevedResource{private static CrackSleevedResource singleton;private SleeveSecurity data = new SleeveSecurity();public static void Setup(byte[] paramArrayOfbyte) {singleton = new CrackSleevedResource(paramArrayOfbyte);//singleton = new CrackSleevedResource(CommonUtils.readResource("resources/cobaltstrike.auth"));}public static byte[] DecodeResource(String paramString) {return singleton._DecodeResource(paramString);}public static byte[] EncodeResource(String paramString) {return singleton._EncodeResource(paramString);}private CrackSleevedResource(byte[] paramArrayOfbyte) {this.data.registerKey(paramArrayOfbyte);}private byte[] _DecodeResource(String paramString) {byte[] arrayOfByte1 = CommonUtils.readResource(paramString);if (arrayOfByte1.length > 0) {long l = System.currentTimeMillis();return this.data.decrypt(arrayOfByte1);}byte[] arrayOfByte2 = CommonUtils.readResource(paramString);if (arrayOfByte2.length == 0) {CommonUtils.print_error("Could not find sleeved resource: " + paramString + " [ERROR]");} else {CommonUtils.print_stat("Used internal resource: " + paramString);}return arrayOfByte2;}private byte[] _EncodeResource(String paramString){try {File fileResource = new File(paramString);InputStream fileStream = new FileInputStream(fileResource);if (fileStream != null){byte[] fileBytes = CommonUtils.readAll(fileStream);if (fileBytes.length > 0){byte[] fileEncBytes = this.data.encrypt(fileBytes);return fileEncBytes;}}} catch (FileNotFoundException e) {e.printStackTrace();}return null;}}
把原本的jar包中的sleeve解压出来,准备解密
javac -encoding UTF-8 -classpath cobaltstrike.jar CrackSleeve.javajava -classpath cobaltstrike.jar:. CrackSleeve decode
把解密出来的dll拉到ida里面,定位0x2e的位置,修改即可
修改完成之后,再保存输出即可,最好创建一个备份,然后ok。其他的dll和这个修改的方式一样。
未完待续...
参考
https://github.com/emo-cat/ysoserial_rs
https://mp.weixin.qq.com/s/do88_4Td1CSeKLmFqhGCuQ
安恒信息
✦
杭州亚运会网络安全服务官方合作伙伴
成都大运会网络信息安全类官方赞助商
武汉军运会、北京一带一路峰会
青岛上合峰会、上海进博会
厦门金砖峰会、G20杭州峰会
支撑单位北京奥运会等近百场国家级
重大活动网络安保支撑单位
END
长按识别二维码关注我们
如有侵权请联系:admin#unsafe.sh