I recently saw a post on LinkedIn where the poster had apparently removed all accounts which wer 2025-11-19 18:46:57 Author: derflounder.wordpress.com(查看原文) 阅读量:23 收藏
I recently saw a post on LinkedIn where the poster had apparently removed all accounts which were assigned administrator rights on the Mac from the local group named admin on macOS and then had difficulty recovering from this state.

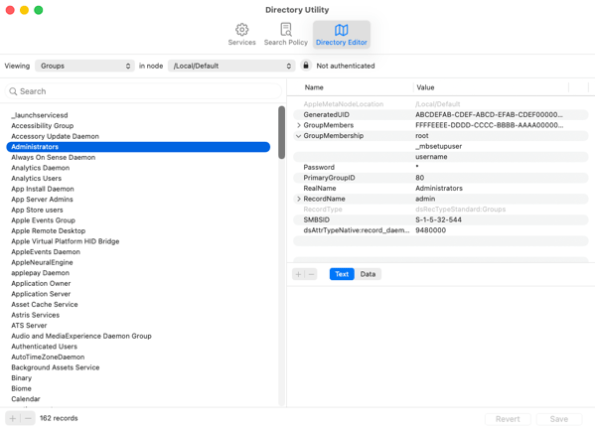
On macOS, membership in the admin group is what grants administrator rights, so now this meant that the Mac only had accounts which had standard user rights.

There have been methods available in the past for fixing this from the Recovery environment which used the chroot command line tool in the Recovery environment to change the active filesystem from the Recovery environment to the Mac’s regular boot drive, then run the dseditgroup command line tool to re-add one or more local user accounts to the admin group on the boot drive. However, it looks like the chroot command does not work currently in the Recovery environment available to macOS Tahoe on Apple Silicon Macs. When launched, it reports an error and then exits.

With the chroot command line tool no longer working in Recovery, that would seem to close off most avenues to re-adding users to the admin group for Apple Silicon Macs running macOS Tahoe. However, after some research, I’ve discovered an alternative method which uses the sudo command line tool. For more details, please see below the jump.
This method uses the ability on macOS for the sudo command line tool to use properly formatted configurations for the sudo tool, where those configuration files are stored as plaintext files in the /private/etc/sudoers.d directory. The following process will create a sudo configuration which is stored in a plaintext file named fixadmin which will be created from the Recovery environment and stored in the /private/etc/sudoers.d directory in the writeable part of the Mac’s boot drive.
What this configuration file will do is allow a user account which otherwise has standard user rights to run the dseditgroup command line tool with root privileges, which in turn will enable the user account to add itself (or another account) to the local group named admin using the dseditgroup command line tool. The end result of this process is that administrator rights will be granted to the account being added to the admin group.
Pre-requisites:
- Physical access to the Mac in question.
- The account shortname of the account being used to run the dseditgroup command line tool with root privileges
- If Mac is encrypted using FileVault, you will need the FileVault recovery key and the password to a FileVault-enabled account.
Once the pre-requisites are handled, use the following process to create the configuration file for the sudo command line tool:
1. Boot to the Recovery environment.
2. If required, enter the FileVault recovery key to access the Recovery environment.

3. If you needed to unlock using the FileVault recovery key, once unlocked choose the Exit to Recovery option.

4. From the Recovery window, click on Disk Utility.

5. Verify that the Data volume is mounted.

If the Data volume is not mounted, click the Mount button in Disk Utility to mount it.

If FileVault is enabled, you will need to enter the password of a FileVault-enabled account to mount the Data volume.

6. Quit out of Disk Utility.
7. Open Terminal using the Utilities menu.

8. Run the following command to create a file named fixadmin in the /Volumes/Data/private/etc/sudoers.d directory:
This file contains hidden or bidirectional Unicode text that may be interpreted or compiled differently than what appears below. To review, open the file in an editor that reveals hidden Unicode characters.
Learn more about bidirectional Unicode characters
| touch /Volumes/Data/private/etc/sudoers.d/fixadmin |

9. Run the following command to edit the /Volumes/Data/private/etc/sudoers.d/fixadmin file using the nano command line text editor:
This file contains hidden or bidirectional Unicode text that may be interpreted or compiled differently than what appears below. To review, open the file in an editor that reveals hidden Unicode characters.
Learn more about bidirectional Unicode characters
| /Volumes/Macintosh\ HD/usr/bin/nano /Volumes/Data/private/etc/sudoers.d/fixadmin |

10. Add the following line to the fixadmin file:
This file contains hidden or bidirectional Unicode text that may be interpreted or compiled differently than what appears below. To review, open the file in an editor that reveals hidden Unicode characters.
Learn more about bidirectional Unicode characters
| username_goes_here ALL = (ALL) /usr/sbin/dseditgroup |
This file should be formatted as follows:
A. Enter the account shortname of the user account that you want to grant admin rights to.
B. Hit the Tab key to create a tabbed space
C. Enter the rest of the line:
ALL = (ALL) /usr/sbin/dseditgroup
For example, if the user account in question has the account shortname of username, the entry should look like this:
This file contains hidden or bidirectional Unicode text that may be interpreted or compiled differently than what appears below. To review, open the file in an editor that reveals hidden Unicode characters.
Learn more about bidirectional Unicode characters
| username ALL = (ALL) /usr/sbin/dseditgroup |

11. Verify that the line is formatted correctly.
12. To save changes, press the Control key and the X key together (Control + X) on your keyboard.
13. You will be prompted to save unsaved changes. When prompted, save the changes.


14. Boot back to macOS.
15. Log in as the account to which you granted rights to run the dseditgroup command line tool using sudo.
16. Open Terminal and run the following command:
This file contains hidden or bidirectional Unicode text that may be interpreted or compiled differently than what appears below. To review, open the file in an editor that reveals hidden Unicode characters.
Learn more about bidirectional Unicode characters
| sudo dseditgroup -o edit -a username_goes_here -t user admin |
For example, if the user account in question has the account shortname of username, the command should look like this:
This file contains hidden or bidirectional Unicode text that may be interpreted or compiled differently than what appears below. To review, open the file in an editor that reveals hidden Unicode characters.
Learn more about bidirectional Unicode characters
| sudo dseditgroup -o edit -a username -t user admin |

17. Verify that the desired account now has administrator rights.

18. Remove the fixadmin file from the /private/etc/sudoers.d directory by running the following command:
This file contains hidden or bidirectional Unicode text that may be interpreted or compiled differently than what appears below. To review, open the file in an editor that reveals hidden Unicode characters.
Learn more about bidirectional Unicode characters
| sudo rm /private/etc/sudoers.d/fixadmin |

如有侵权请联系:admin#unsafe.sh