
文章介绍如何在Kali Linux上安装NVIDIA驱动、CUDA工具包及Pyrit和Cpyrit-cuda,以实现GPU加速功能。通过添加官方仓库、安装依赖项、编译和配置工具包,最终完成对cudaHashcat等应用的加速支持,并提供测试方法。 2025-5-12 23:29:7 Author: www.blackmoreops.com(查看原文) 阅读量:7 收藏
In this guide, I will show how to install NVIDIA driver kernel Module CUDA, replace stock Pyrit, and install Cpyrit.At the end of this guide, you will be able to use GPU acceleration for enabled applications such as cudaHashcat, Pyrit, crunch etc. 
This guide replaces the old guide
This is part 2 of installing NVIDIA driver kernel Module CUDA and Pyrit on Kali Linux Driver series which was divided into two parts:
- Install proprietary NVIDIA driver on Kali Linux – NVIDIA Accelerated Linux Graphics Driver
- Install NVIDIA driver kernel Module CUDA and Pyrit on Kali Linux – CUDA, Pyrit and Cpyrit-cuda
You use the first guide to install NVIDIA Driver on Kali Linux. I would assume you followed the first guide and completed all steps there and would like to enable GPU acceleration, (cudahashcat, GPU pass through etc.) on your Kali Linux.
CUDA Toolkit
The NVIDIA® CUDA® Toolkit provides a comprehensive development environment for C and C++ developers building GPU-accelerated applications. The CUDA Toolkit includes a compiler for NVIDIA GPUs, math libraries, and tools for debugging and optimizing the performance of your applications. You’ll also find programming guides, user manuals, API reference, and other documentation to help you get started quickly accelerating your application with GPUs. You can read a lot more here in NVIDIA Developers official webpage:
Prerequisites
Following are the prerequisite before you start following this guide:
Prerequisite 1: add Official Kali Linux repository.
I’ve added the correct Kali Official repositories and issued the following commands to update, upgrade and dist-upgrade my Kali Linux.
apt-get update && apt-get upgrade -y && apt-get dist-upgrade -y
Prerequisite 2: Install proprietary NVIDIA driver on Kali Linux
I’ve installed the correct official proprietary NVIDIA driver on Kali Linux – NVIDIA Accelerated Linux Graphics Driver using the previous guide:
If you’ve completed both, move to next instruction.
Step 1: Install NVIDIA CUDA toolkit and openCL
At first we need to install NVIDIA CUDA toolkit and NVIDIA openCL
aptitude install nvidia-cuda-toolkit nvidia-opencl-icd
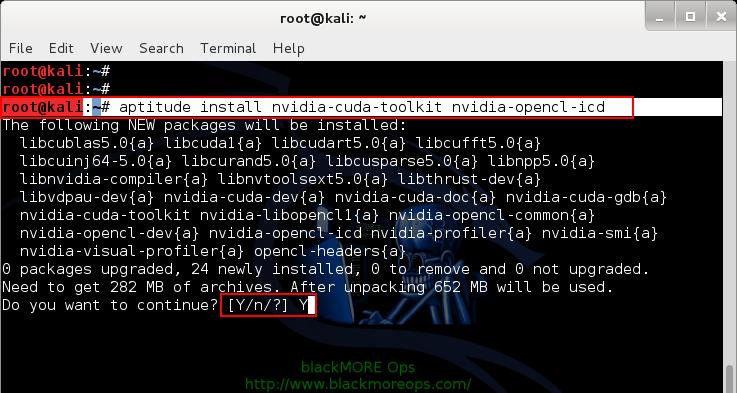
This will install CUDA packages in your Kali Linux. The total package is pretty large including dependencies, (282MB something), you be patient and let it finish.
Step 2: Download Pyrit and Cpyrit
Download Pyrit and Cpyrit from the official website:
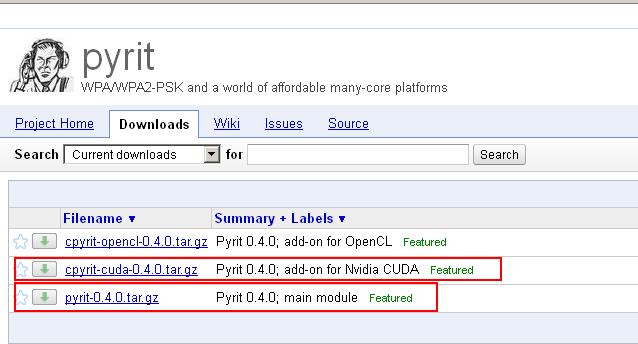
Save them in your /root folder.
Step 3: Install Pyrit
Follow the instructions below to install Pyrit and it’s prerequisites.
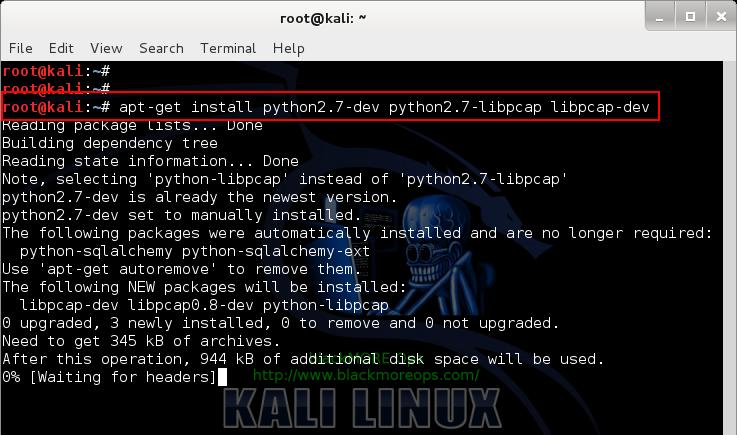
Step 3.a: Install Pyrit prerequisites
apt-get install python2.7-dev python2.7-libpcap libpcap-dev
Step 3.b: Remove existing installation of Pyrit
Remove stock Pyrit using the following command:
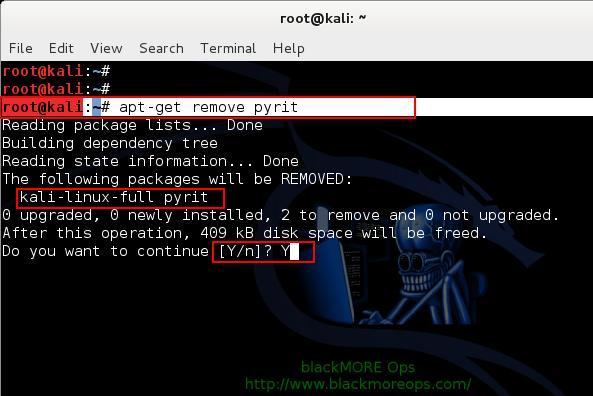
You get a message stating that it will also remove kali-linux-full package. It actually doesn’t. All it does updating Kali repo and remove Pyrit. Finish removing Pyrit.
If you are not using a clean install of Kali (not recommended), you may need to issue the following command:
rm -r /usr/local/lib/python2.7/dist-packages/cpyrit/
Step 3.c: Install new Pyrit
Copy paste the following commands to extract downloaded Pyrit in your Kali Linux /root directory
tar -xzf pyrit-0.4.0.tar.gz
cd pyrit-0.4.0
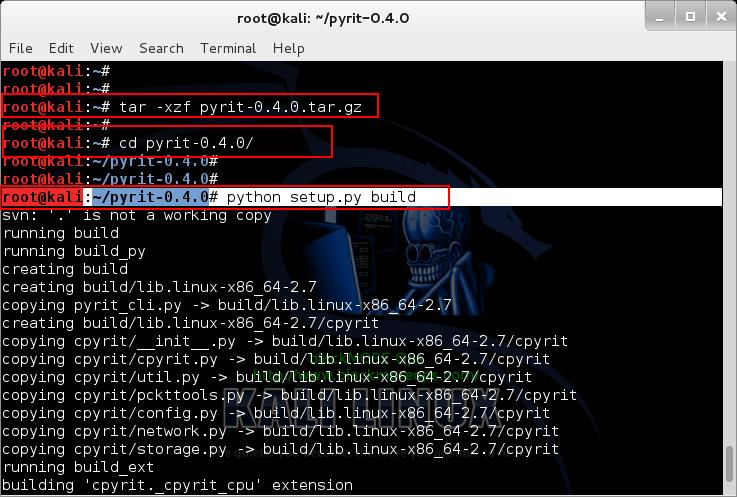
Now build the package
python setup.py build
Once build is complete, you can install Pyrit.
python setup.py install
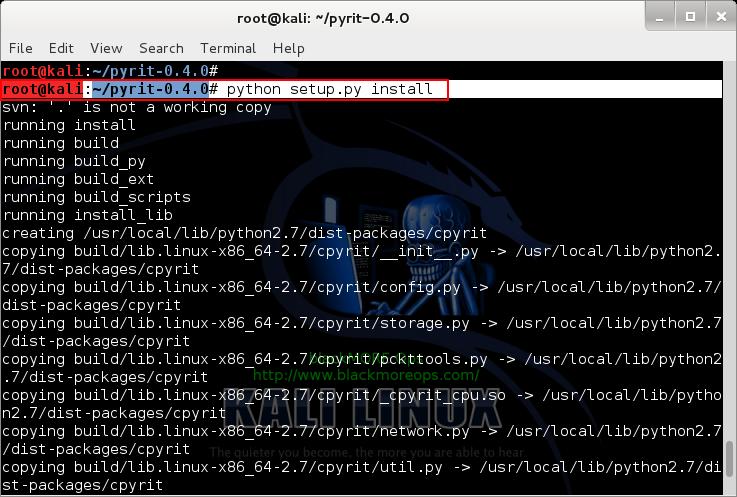
Up to this point, you shouldn’t receive any errors.
Step 4: Install CPyrit-cuda
Copy paste the following commands to extract downloaded CPyrit-cuda in your Kali Linux /root directory
tar -xzf cpyrit-cuda-0.4.0.tar.gz
cd cpyrit-cuda-0.4.0
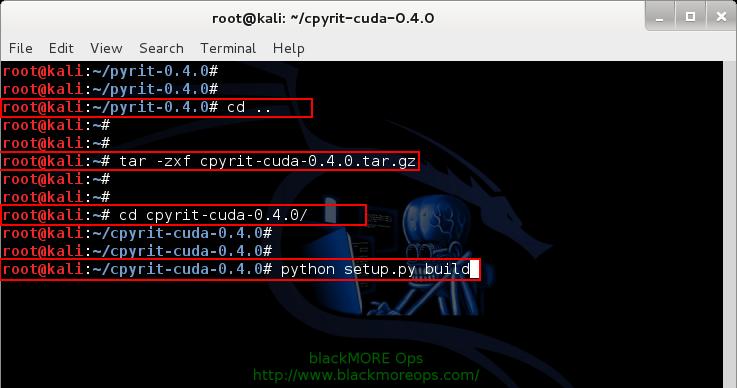
Now build the package
python setup.py build
Once build is complete, you can install CPyrit-cuda.
python setup.py install
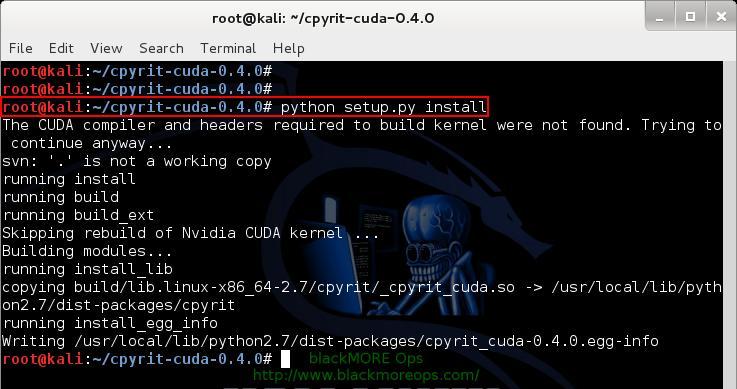
Again, you shouldn’t receive any errors, if there’s error, go back and review each steps.
Step 5: Testing and troubleshooting
Now that we’ve installed NVIDIA driver kernel Module CUDA and Pyrit on Kali Linux, we should be able to test it. The best way to test is by issuing the following command:
pyrit list_cores
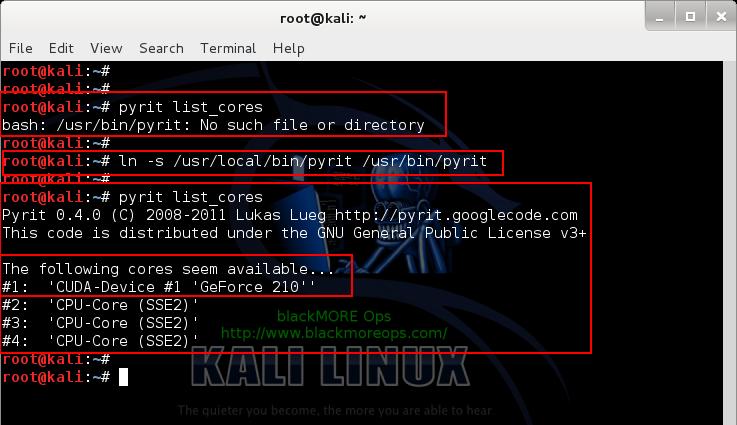
This gave me an error “ bash: /usr/bin/pyrit: No such file or directory “.
It seems this Pyrit puts its binaries in wrong folder than you’d expect. The actual path for Pyrit is now /usr/local/bin/pyrit
Step 5.a Softlink them or add path to profile
There’s two different ways you can resolve it. You can either softlink or add this /usr/local/bin/ path to your profile. Choice is again yours.
Step 5.a.i: Softlinking
This is what I’ve followed
ln -s /usr/local/bin/pyrit /usr/bin/pyrit
Step 5.a.ii: Add path
If you want only to specific user edit ~/.bash_profile or ~/.bashrc and put there
export PATH=$PATH:/usr/local/bin
If you want for all users edit /etc/profile and scroll down until you see something like
PATH="/bin:/usr/bin:/sbin:/usr/sbin" export PATH
Append to the end /usr/local/bin. it will be
PATH="/bin:/usr/bin:/sbin:/usr/sbin:/usr/local/bin"
and Finally
Once you’ve either Softlinked or added the correct path to your profile, then following is what you get
root@kali:~# pyrit list_cores
Pyrit 0.4.0 (C) 2008-2011 Lukas Lueg http://pyrit.googlecode.com
This code is distributed under the GNU General Public License v3+

The following cores seem available...
#1:  'CUDA-Device #1 'GeForce 210''
#2:  'CPU-Core (SSE2)'
#3:  'CPU-Core (SSE2)'
#4:  'CPU-Core (SSE2)'
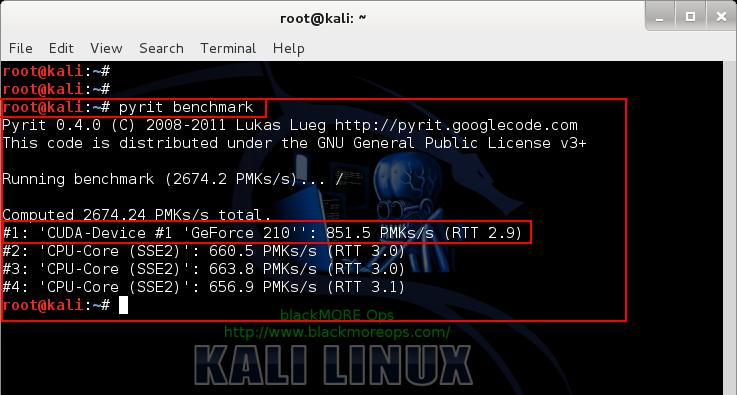
and of course I did a benchmark with my GeForce 210 card:
root@kali:~# pyrit benchmark
Pyrit 0.4.0 (C) 2008-2011 Lukas Lueg http://pyrit.googlecode.com
This code is distributed under the GNU General Public License v3+

Running benchmark (2744.1 PMKs/s)... -

Computed 2744.11 PMKs/s total.
#1: 'CUDA-Device #1 'GeForce 210'': 853.1 PMKs/s (RTT 3.0)
#2: 'CPU-Core (SSE2)': 648.1 PMKs/s (RTT 2.8)
#3: 'CPU-Core (SSE2)': 647.6 PMKs/s (RTT 2.9)
#4: 'CPU-Core (SSE2)': 658.5 PMKs/s (RTT 3.0)
root@kali:~#
Conclusion
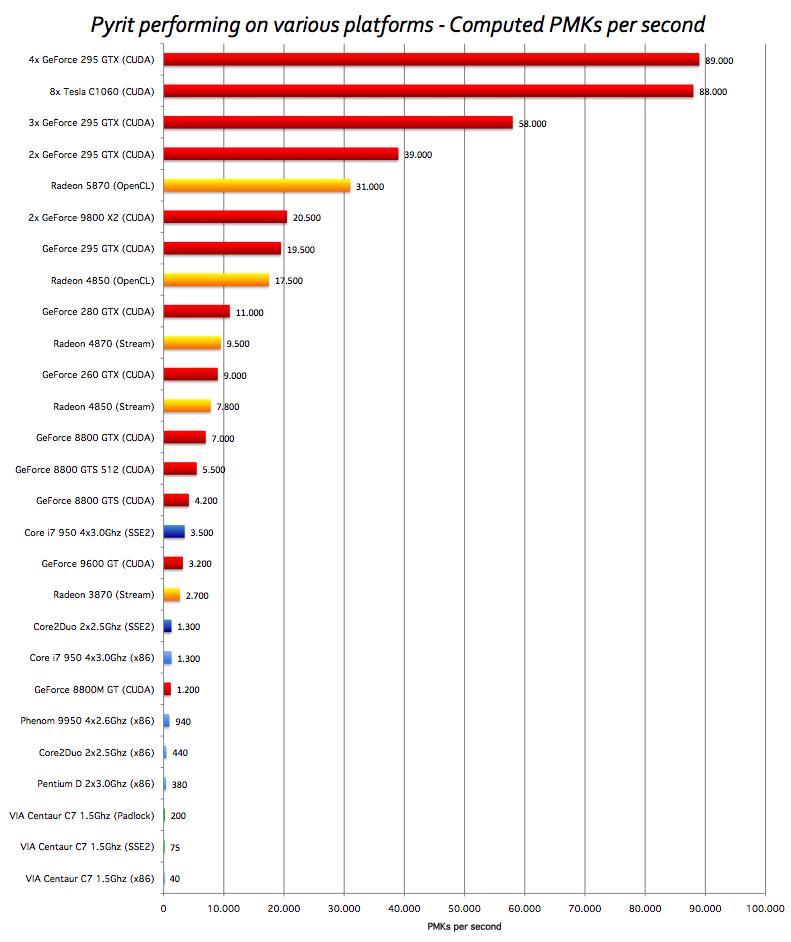
Pyrit allows to create massive databases, pre-computing part of the IEEE 802.11 WPA/WPA2-PSK authentication phase in a space-time-tradeoff. Exploiting the computational power of Many-Core- and other platforms through ATI-Stream, Nvidia CUDA and OpenCL, it is currently by far the most powerful attack against one of the world’s most used security-protocols.
Here’s a great benchmark done with Pyrit and CUDA for different GPU’s
Thanks for reading. If this guide helped you to install NVIDIA driver kernel Module CUDA and Pyrit on Kali Linux – CUDA, Pyrit and Cpyrit-cuda, please share this article and follow me in Facebook/Twitter.
ah and don’t forget to show off your Pyrit Benchmark. ;)
如有侵权请联系:admin#unsafe.sh